SQL Server 2008数据库设置定期自动备份的方法
1、说明
日常工作中利用SQL SQLSERVER 2008的维护计划对数据库进行定期自动备份,这样一方面可以对数据库进行备份保证数据安全,另一方面也可以减轻对维护人员的负担。SQL Server2008 本身具有定期自动备份功能,我们只需要通过简单的配置就可以实现非常简单高效的自动备份功能。
下面话不多说了,来一起看看详细的介绍吧
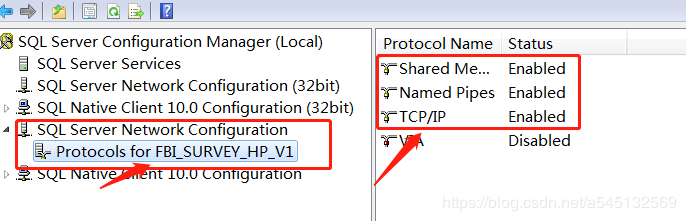
2、打开SQL Server代理服务
要实现自动备份功能,首先要保证SQL Server的"SQL Server(代理)"服务已经打开。
如果没有看到这个"SQL Server代理"节点,可通过如下方式打开
先找到开始菜单中的"Microsoft SQL Server 2008 R2",再在"配置工具"中选择"SQL Server配置管理器"

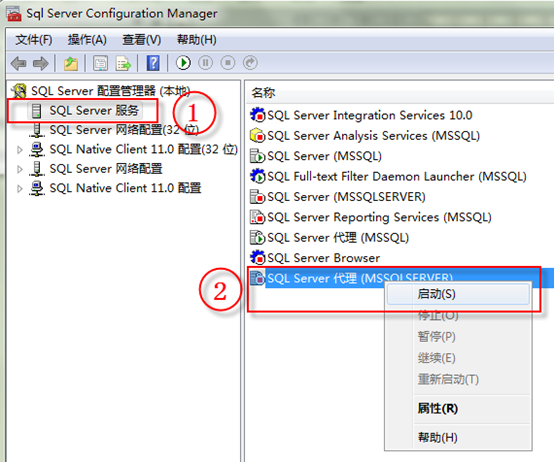
在"Sql Server Configuration Manager"窗口中选择"SQL Server服务",再在右边的"SQL Server 代理"右键,选择"启动"
3、建立备份计划
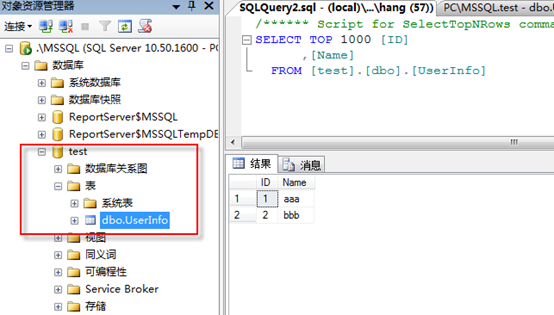
假设现在有一个名为"test"的数据库,现在要对这个数据库进行定期备份
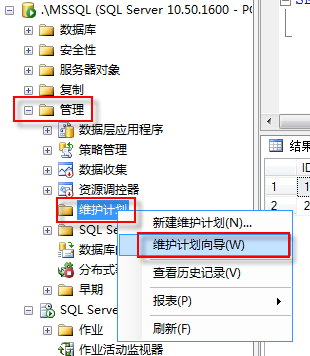
在"管理"节点下的"维护计划"上右键,然后选择"维护计划向导",如下图
如果此时弹出如下错误窗提示口
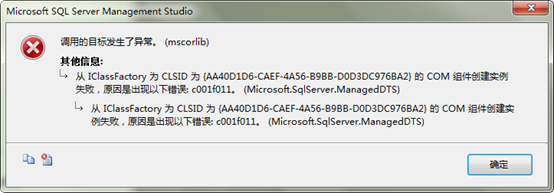
按如下方法解决
"开始"=》"运行",打开控制台窗口,
如果是32位的操作系统,运行如下命令
c:\windows\system32\regsvr32 "C:\Program Files\Microsoft SQL Server\100\DTS\Binn\dts.dll"
如果是64位的操作系统,运行如下命令
c:\windows\syswow64\regsvr32 "C:\Program Files (x86)\Microsoft SQL Server\100\DTS\Binn\dts.dll"
然后将"Microsoft SQL Server Management Studio"关闭后再打开。
如果没有出错,会出现"维护计划向导"窗口

点"下一步"按钮
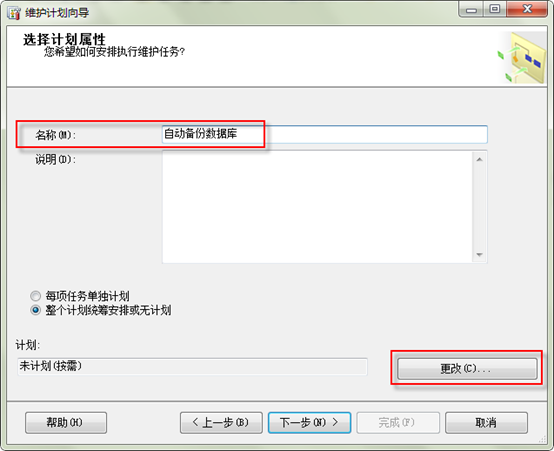
输入维护计划的名称,然后点"更改…"设定备份数据库的时间,如下图
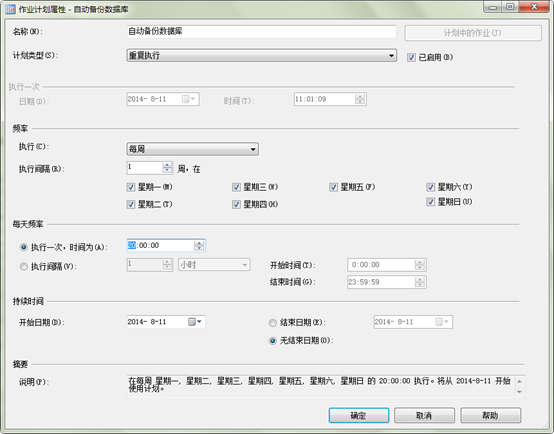
执行的时间设定完后,点"确定",回到原来的窗口后,再点"下一步",
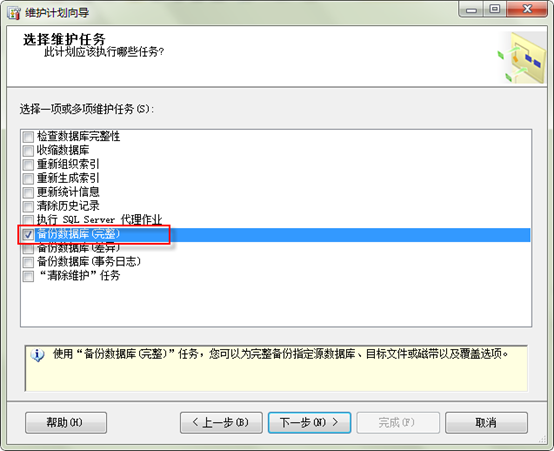
在新窗口中勾选"备份数据库(完整)",然后再点"下一步"
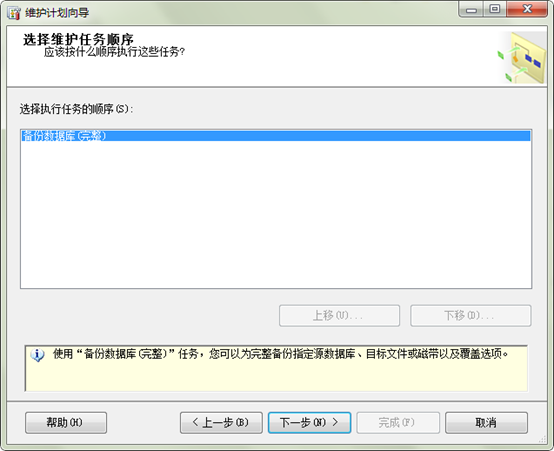
这个窗口是指定任务执行的顺序,由于我们只设定一个任务,就不用管这个,直接"下一步"
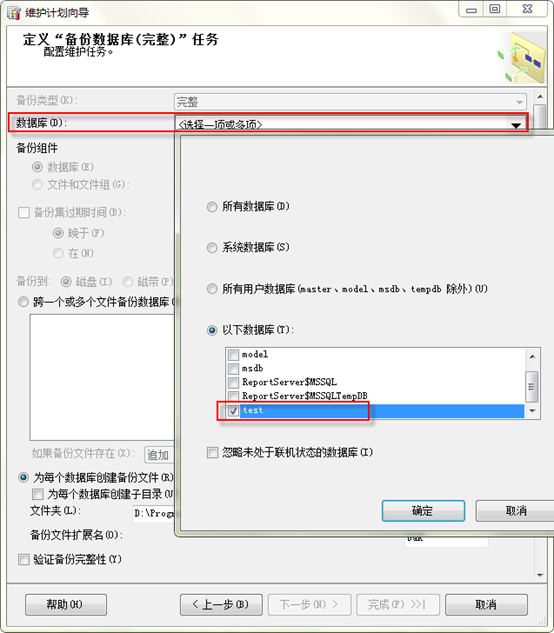
选择我们要备份的数据库"test"
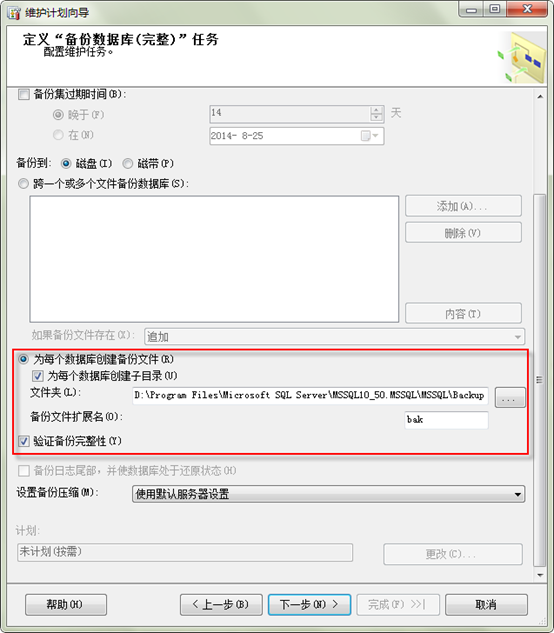
最好把"为每个数据库创建子目录"和"验证备份完整性"勾选,过期时间和压缩可以不管,然后点"下一步"
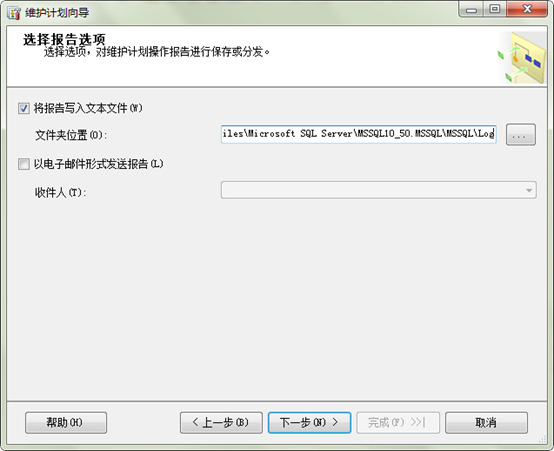
这一步主要是如何处理备份日志,我们可以放到和备份同一个目录或使用默认目录,如果放到备份文件目录,查看会方便一点,点"下一步"

最后点"完成",即可完成自动备份设置。

最后会出现我们的维护计划设定情况窗口,此时备份计划还没有执行。
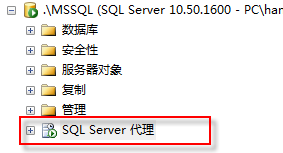
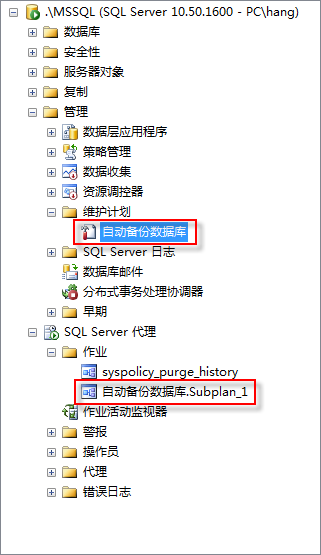
在"管理"下的"维护计划"节点和"SQL Server代理"下的"作业"节点都可以看到我们制定的备份计划。
4、立即执行备份计划
我们也可以不用等到预设的时间就执行我们设定的备份计划,方法如下
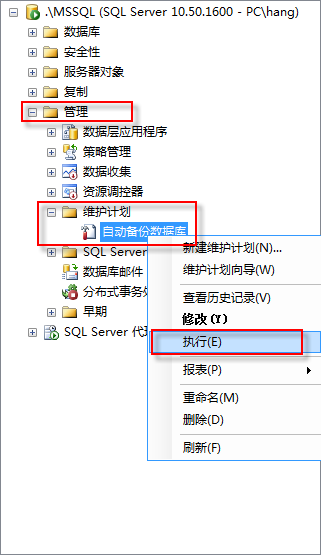
在"维护计划"中找到我们刚建立的名为"自动备份数据库"的备份计划,右键选择"执行"
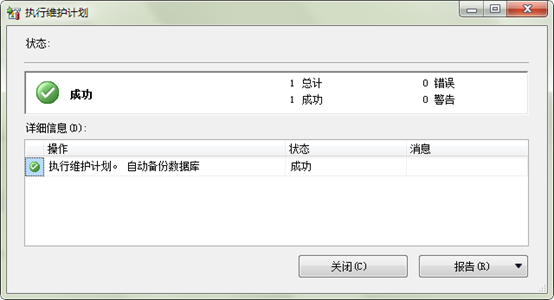
当执行成功后,原先设定的备份目录D:\Program Files\Microsoft SQL Server\MSSQL10_50.MSSQL\MSSQL\Backup看到以被备份数据命名的文件夹,打开文件夹后可看到备份文件
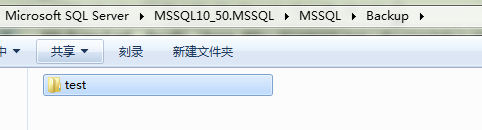
根据设定,每一个数据库的备份放在以数据库名命名的文件夹中。
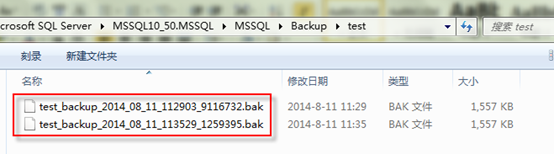
上图为备份计划执行后生成的备份文件。
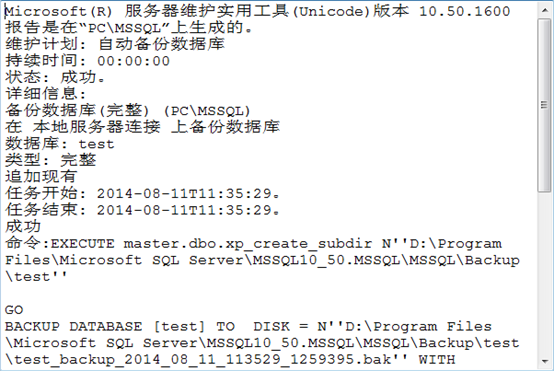
如果备份过程报告日志使用默认配置,那么在数据库的日志文件夹就可以看到备份日志,如下图,每一次备份都会产生一个文本文件的日志。

打开后就可以看到备份日志
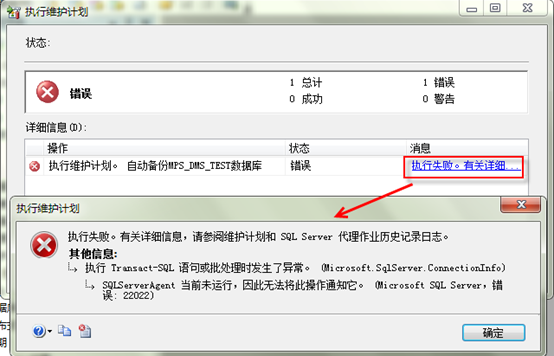
如果执行失败且错误提示如下,说明 SQL Server代理服务没有开启。
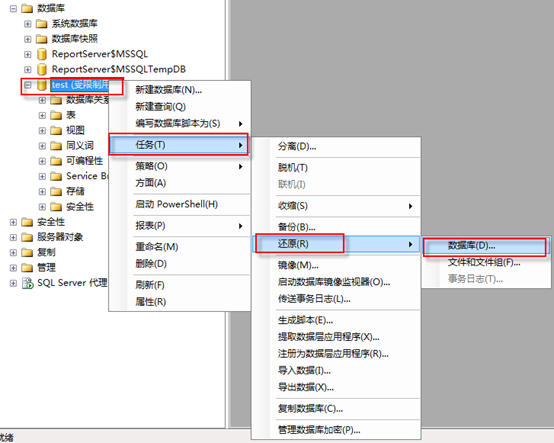
5、还原备份
在要还原的数据库(本例是"test")上右键,任务=》还原=》数据库…
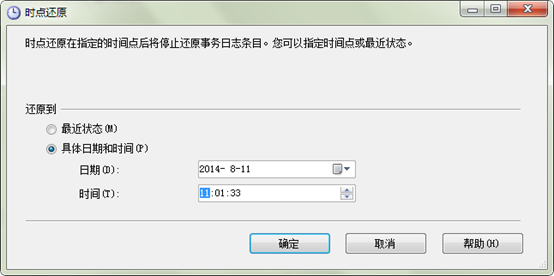
根据时间选择还原点
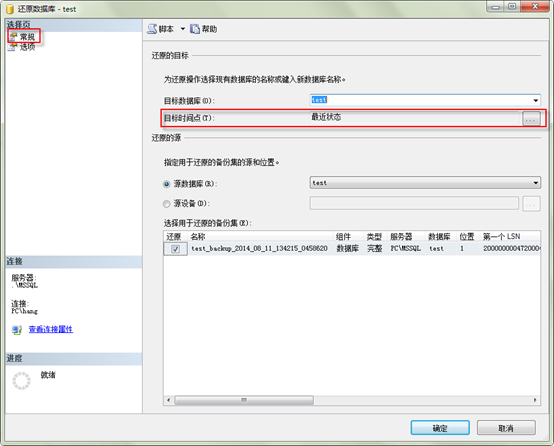
备份是以时间作为还原点,通过选择不同的"目标时间点"就可以还原到不同的备份上去,如果我们修改了"目标时间点",那么下部的"选择用于还原的备份集"中被勾选的名称也会作相应改变。下图是更改目标时间点的对话框。
点击"选项",勾选"覆盖现有数据库"和"限制访问还原的数据库"
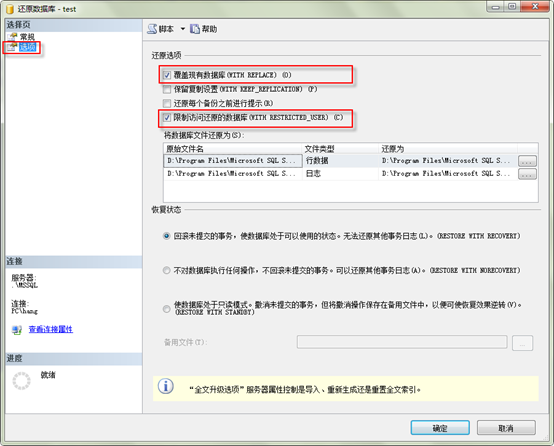
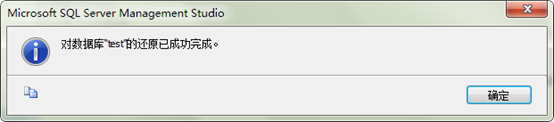
点"确定"
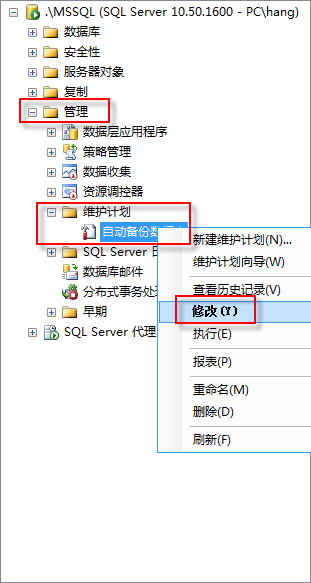
6、修改备份计划
在"维护计划"下我们新建的"自动备份数据库"上右键,再选择"修改",如下图
在打开的新标签页中,可以修改备份行为、备份的时间、备份日志存放位置等。