win10内存不能为written怎么办 win10内存不能为written解决方法
不少用户在使用应用程序或者是玩游戏的时候会遇到系统提示:该内存不能为written,那么这是怎么回事?用户们可以直接的进入到DOS命令界面,然后输入以下代码来进行操作就可以了。下面就让本站来为用户们来仔细的介绍一下win10内存不能为written原因吧。
win10内存不能为written解决方法
方法一
1、通过按快捷键“WIN+R”弹出运行。

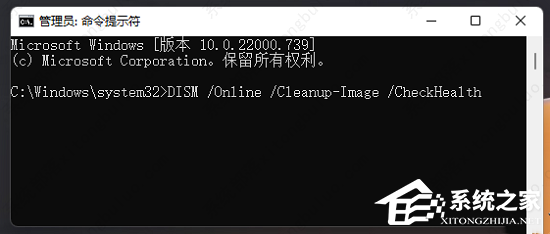
2、输入cmd后点击确定按钮,进入DOS命令界面。

3、在命令提示符下输入:for %1 in (%windir%\system32\*、dll) do regsvr32、exe /s %1,输好代码后,敲击回车键。
4、系统开始重新注册dll文件,这需要稍微等待一段时间,等dll文件重新注册完成后内存不能为read或written的问题就解决了。

方法二
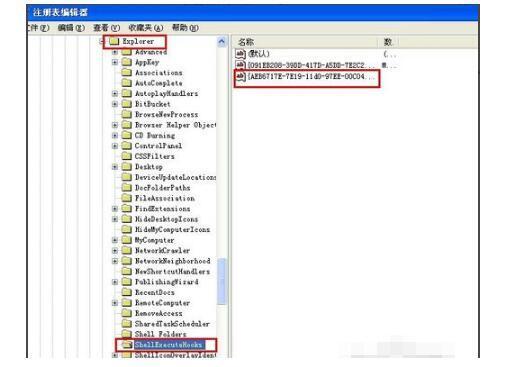
1、按下键盘上的win+r打开电脑的运行功能,输入regedit进入注册表。在HKEY_LOCAL_MACHINESOFTWAREMicrosoftWindowsCurrentVersionExplorerShellExecuteHooks下,应该只有一个正常的键值“{AEB6717E-7E19-11d0-97EE-00C04FD91972}, 将其他的删除即可。
方法三
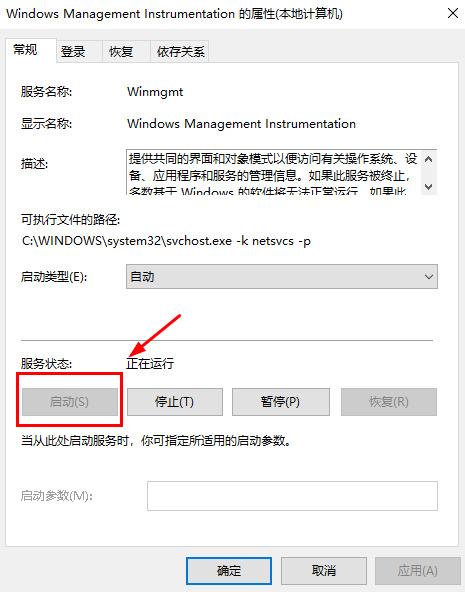
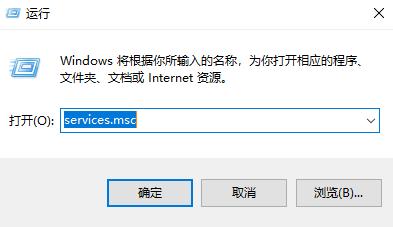
1、按下win+r打开电脑上的运行功能,输入services、msc,之后点击确定。
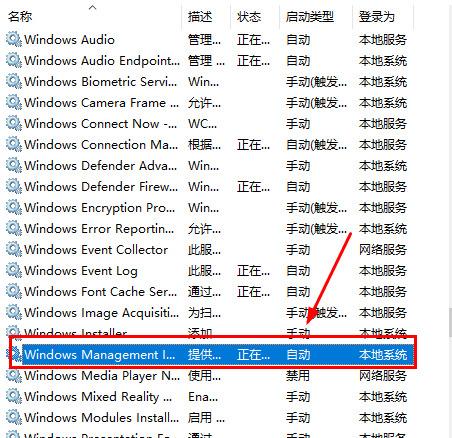
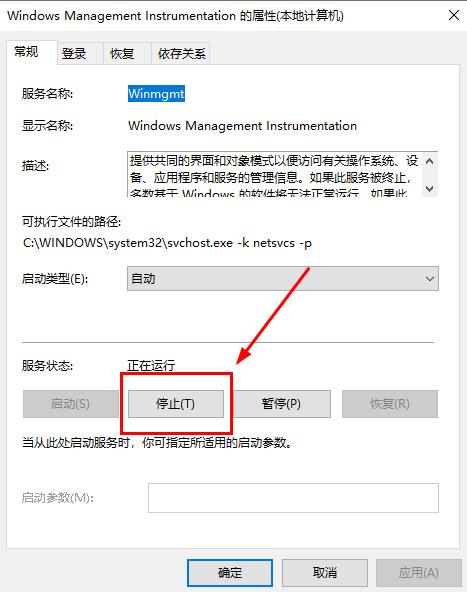
2、在服务窗口中找到Windows Management Instrumentation服务,单击“停止”,然后点击确定。
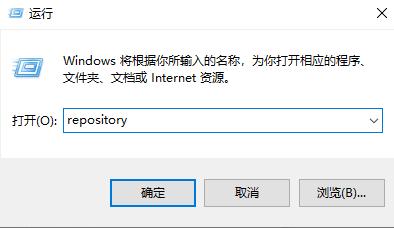
3、还是按下win+r,打开电脑的运行功能,输入repository。对文件夹窗口全部文件进行备份(自带或U盘),备份完后将文件夹中全部删除。
4、重启关机后打开服务展开“Windows Management Instrumentation”,按钮“启用”,运行正常服务启动。之后就可以正常使用软件或者运行游戏了。如果该方法无效的话,记得还原repository中删除的文件,不然可能会影响系统正常运行。