net4.0安装未成功怎么办?Win7旗舰版无法安装net4.0的解决教程
.NET Framework是Windows的托管执行环境,可为其运行的应用提供各种服务,因此不少软件安装的前提是需要系统先配置.NET framework,但是近期有用户遇到了Win7旗舰版无法安装net4.0的情况,那么应该如何解决呢?我们来看看吧。
方法一:
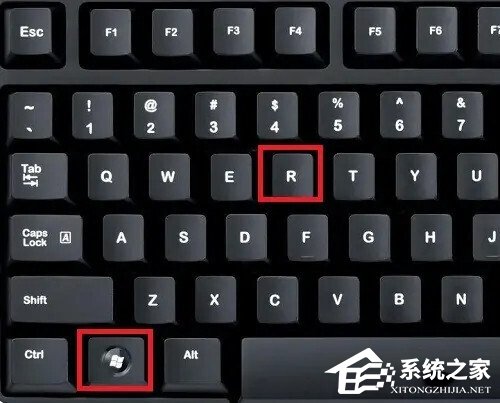
1、我们先在键盘上按windows键+R键。

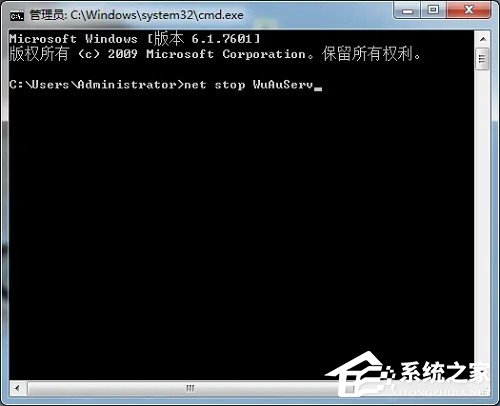
2、在运行框中输入cmd后,点击【确定】。

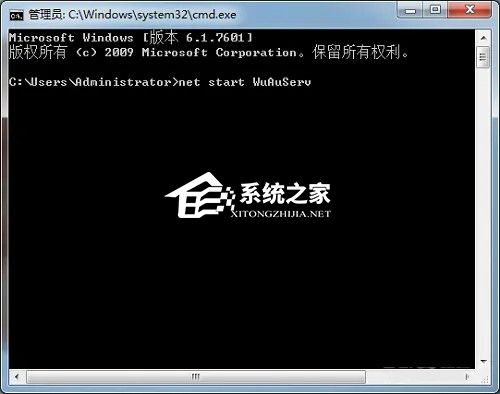
3、在弹出的以下窗口中,输入net stop WuAuServ后按回车键。
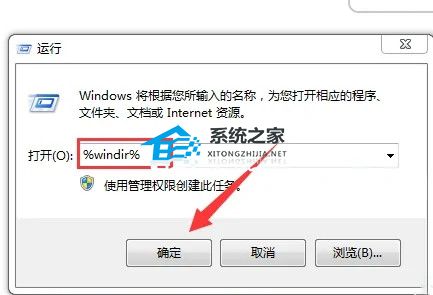
4、然后我们返回到运行窗口,输入%windir%后点击【确定】。
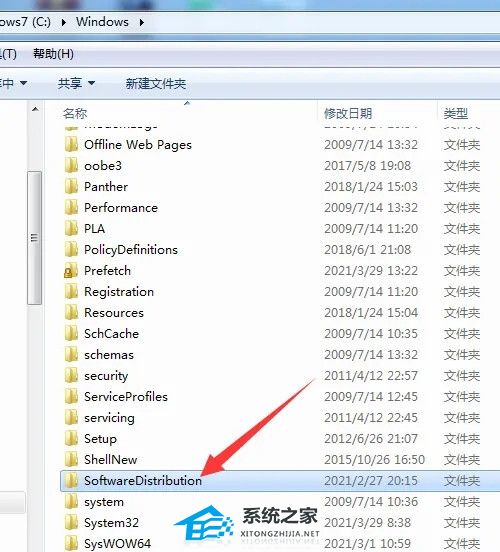
5、进入到windows系统目录页面,我们找到SoftwareDistribution文件夹,将文件夹名修改成SDold。
6、接下来,我们在运行窗口中输入cmd后,点击【确定】。
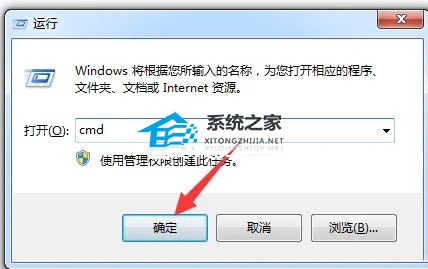
在以下窗口输入net start WuAuServ后按回车键,这下我们再次安装net4.0就可以正常安装啦!
方法二:
1、按Windows+R 输入services.msc,点击打开。
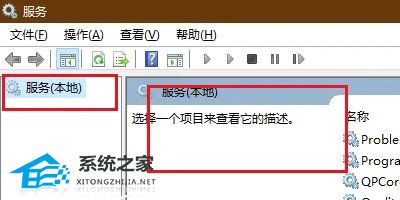
2、打开服务,点击服务(本地)。
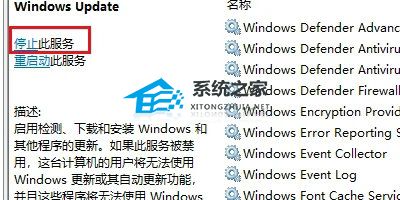
3、在右侧找到Windows Update,点击选中。
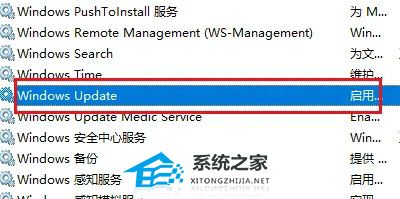
4、点击左上角,点击停止此服务。
5、在资源管理器中,打开电脑C盘。
6、打开Windows文件夹。
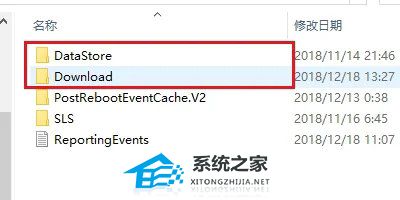
7、找到SoftwareDistribution打开。

8、将SoftwareDistribution当中Download和DataStore进行删除。
9、按照如上步骤重新启动Windows Update。