Win11系统禁用触摸板的设置方法图文教学分享
为大家带来Win11系统禁用触摸板的设置方法图文教学分享。在使用笔记本电脑的时候,有用户常常会碰到触摸板,导致鼠标误移动点击。所以想要去进行触摸板的禁止,那么如何去禁止,接下来看看具体的操作方法。
方法如下:
1、首先我们点击任务栏空白处,选择“任务栏设置”。

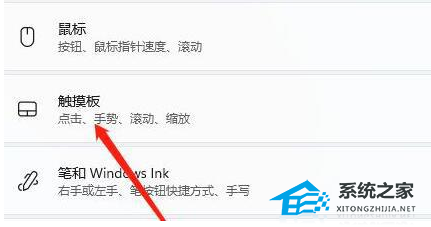
2、打开任务栏设置后,在左侧找到“蓝牙和其他设备”。

3、接着在右侧就能看到“触摸板”设置。
4、展开后,在相关设置下方选择“更多触摸板设置”。

5、最后勾选“插入外置usb指向装置时禁用”,再点击“确定”即可。

以上就是Win11系统禁用触摸板的设置方法图文教学分享,很高兴为大家解答。