Windows?Server?2012下FTP服务器站点搭建程序
Windows Server 2012下FTP服务器站点搭建程序,供大家参考,具体内容如下
第一步:添加IIS服务以及FTP服务角色
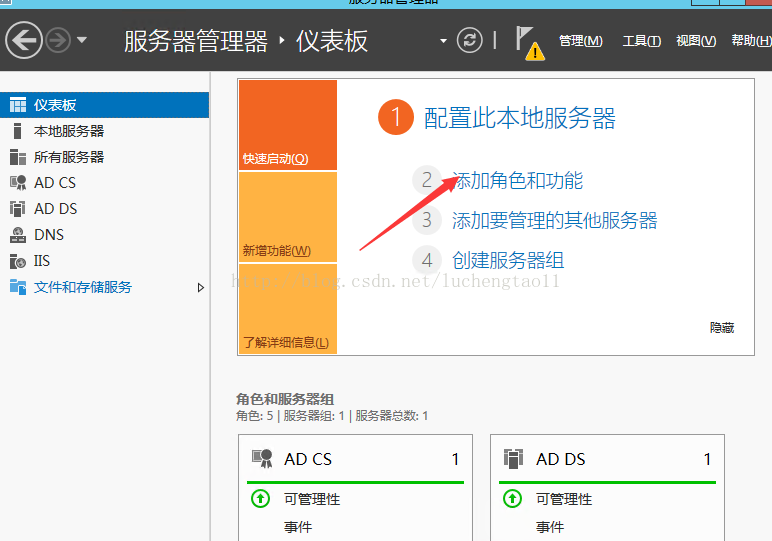
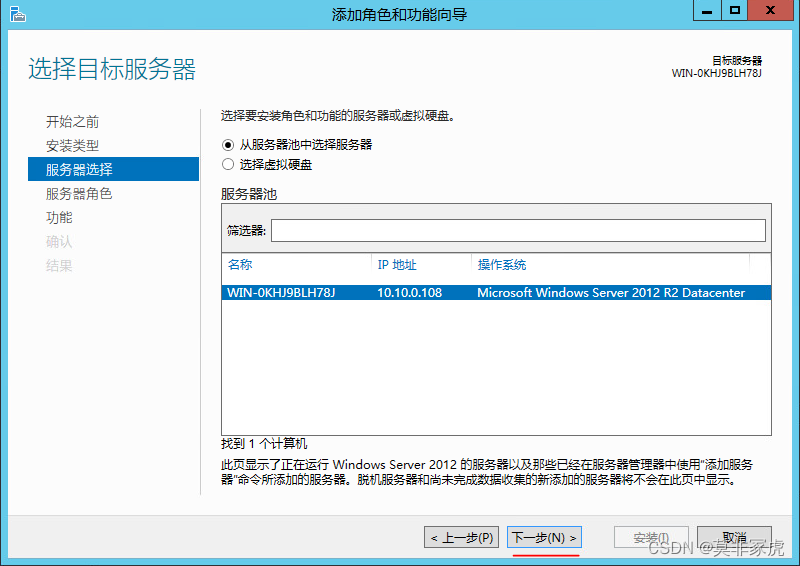
1:打开服务器管理,点击“管理”—“添加角色和功能”—“下一步”
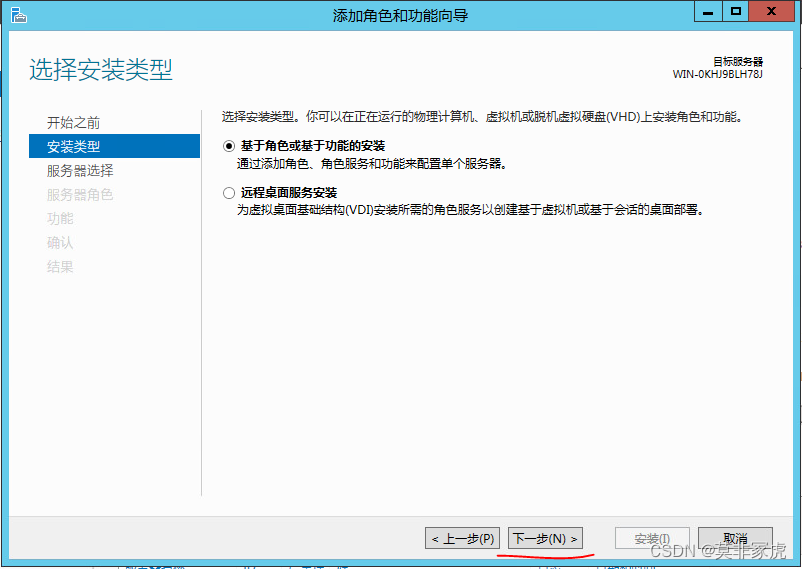
点击“下一步”
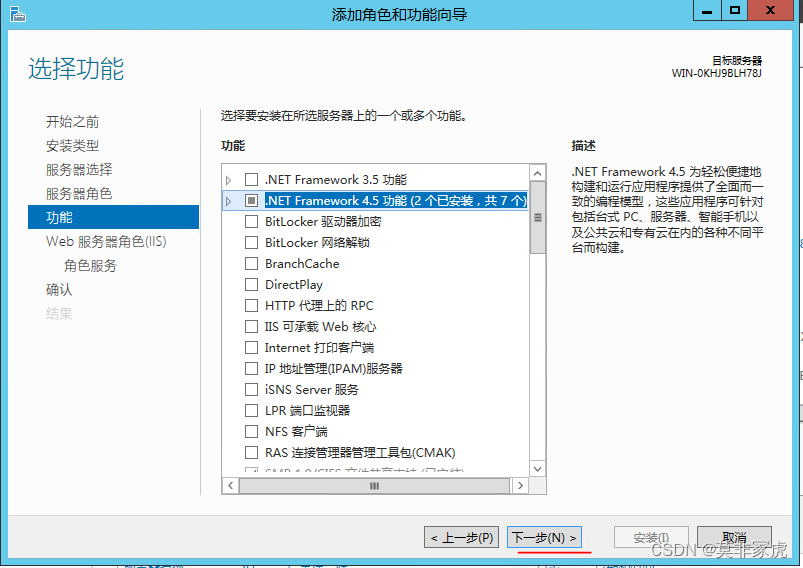
2:勾选“Web服务器(IIS)” 在弹出框中点击“添加功能”—点击“下一步”
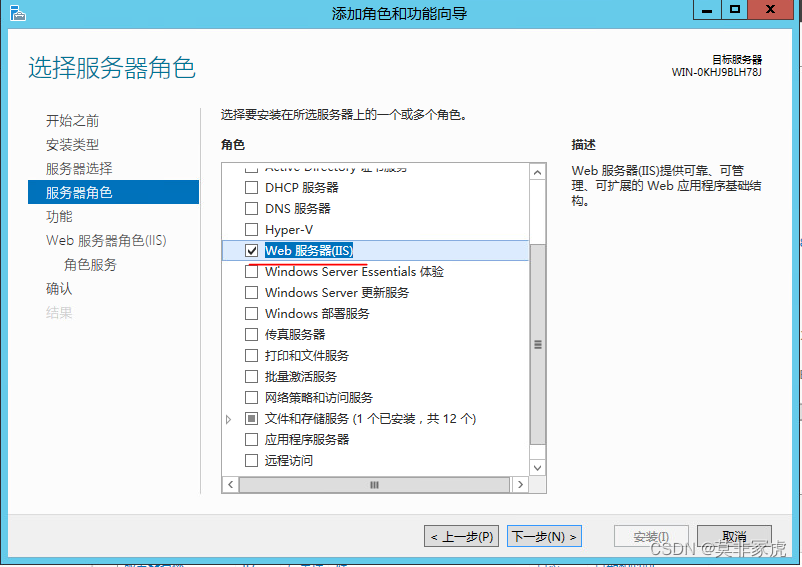
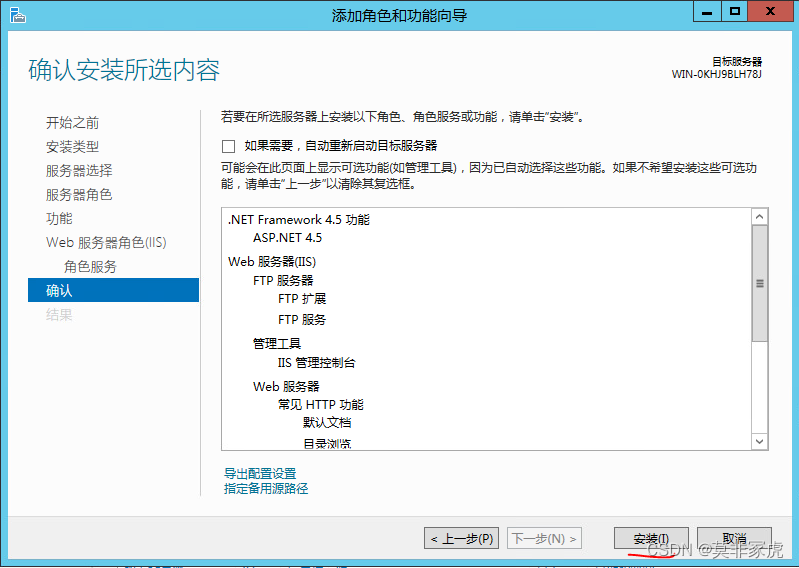
3:在服务角色栏目中勾选如下几个
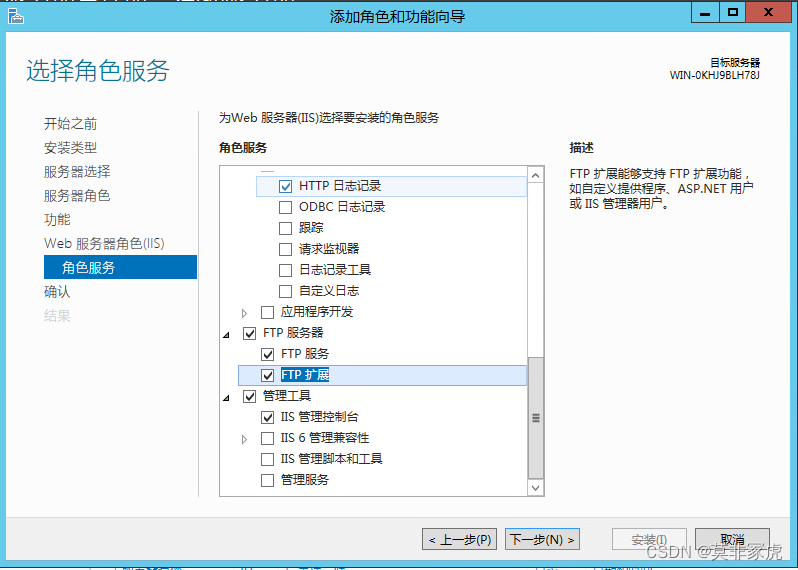
点击“安装”
第二步:创建访问FTP站点的Windows用户
4:点击左下角“开始”按钮,点击“管理工具”—双击“计算机管理”

5:依次点击“系统工具”—“本地用户和组”—“用户”

6:右键右侧空白处,点击“新用户”,填写用户信息,点击“确定”
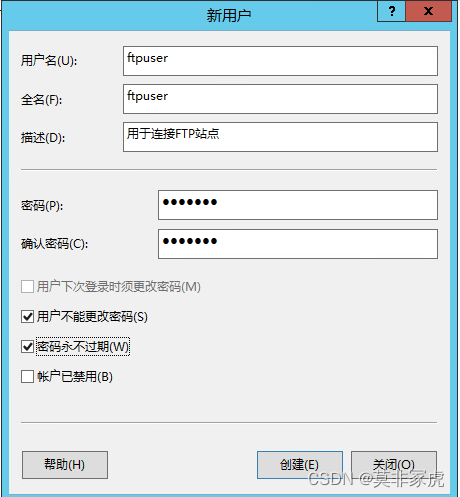
账号创建完毕

第三步:设置FTP文件夹权限
7:在盘符中创建一个FTP站点要共享的文件夹。

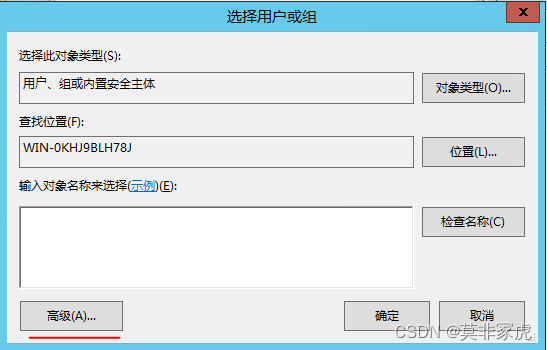
8:右键文件夹FtpFile,点击“属性”—“安全”—“编辑”—“添加”—“高级”—“立即查找” 找到我们刚才创建的FTP连接的Windows账号,点击“确定”
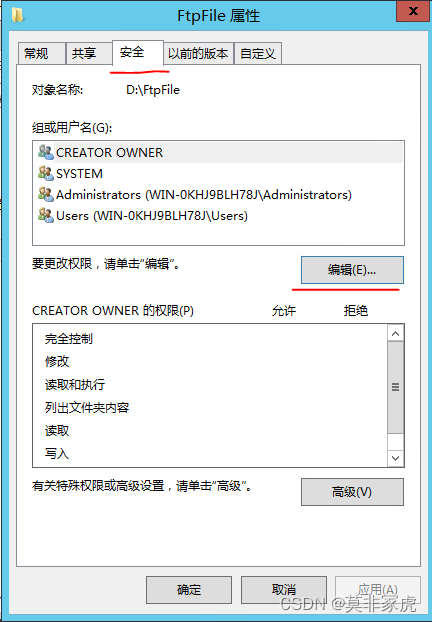

9:依次点击确定或者应用,在安全界面中就匹配好了ftpuser这个账号
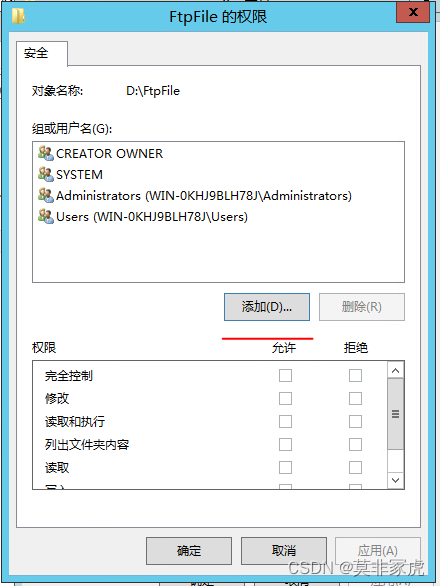
选中账号,点击“编辑”
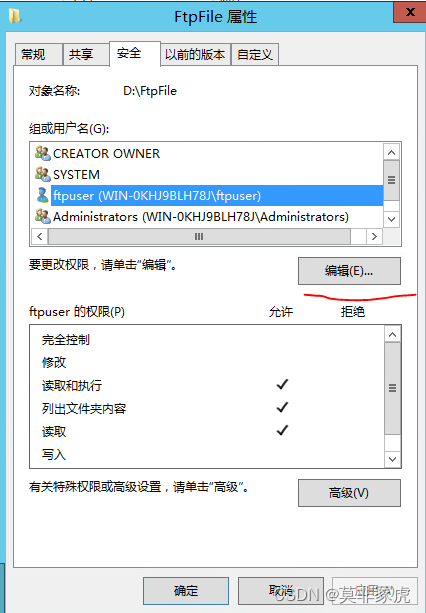
再次选中账号,勾选ftpuser的权限,然后点击“应用”—“确定”

第四步:添加并设置FTP站点
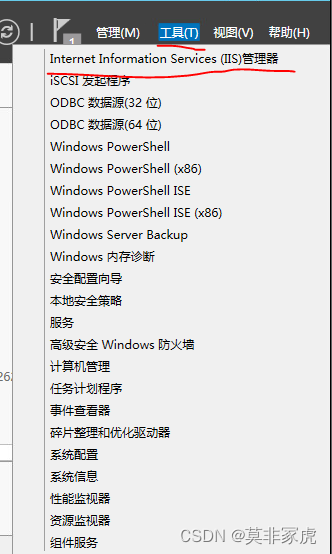
10:打开服务器管理,点击“工具”—“Internet Information Services(IIS)管理器”
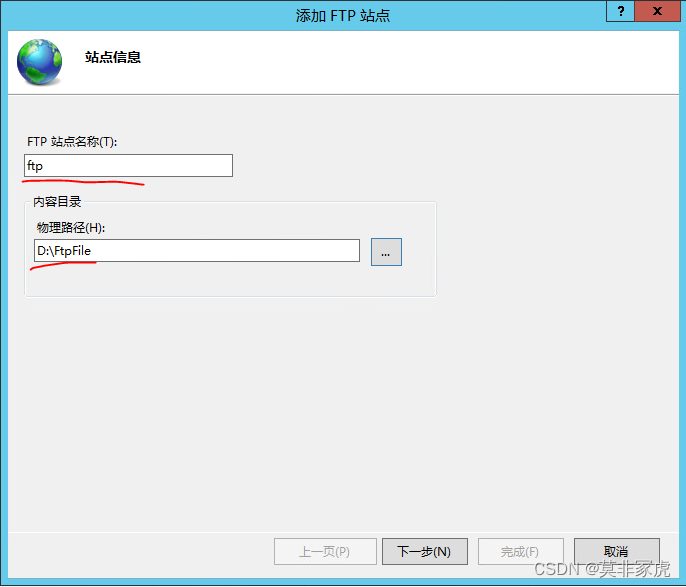
11:点击左侧“网站”,点击右侧“添加FTP站点”

填写FTP站点名称,然后选择刚才创建的FTP文件夹路径
端口默认21,如果这个端口被占用,也可以用别的端口号。勾选“无SSL”,点击“下一步”
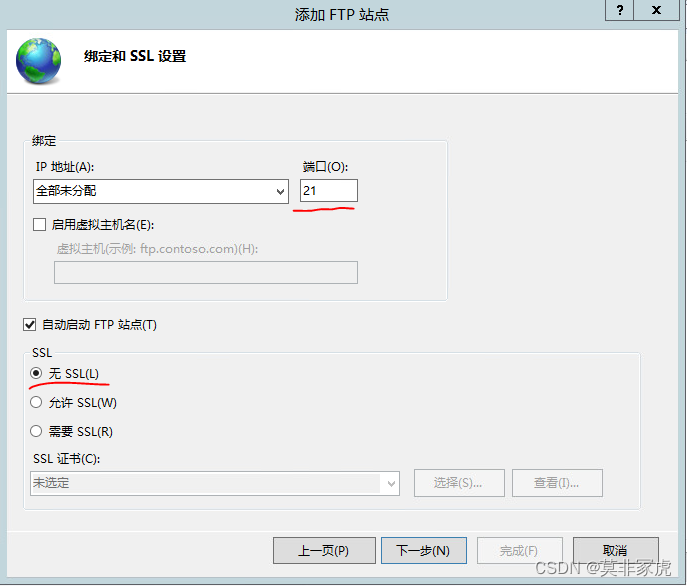
按照顺序完成下面四步,指定的用户就是刚才创建的Windows用户,点击完成。

12:点击ftp站点名字,点击右侧“高级设置”
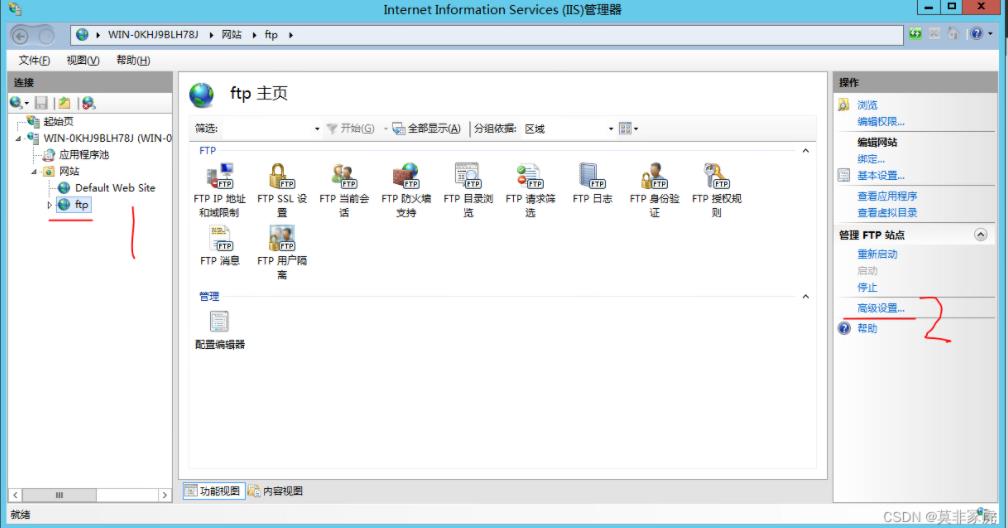
找到允许UTF8,选择“False”

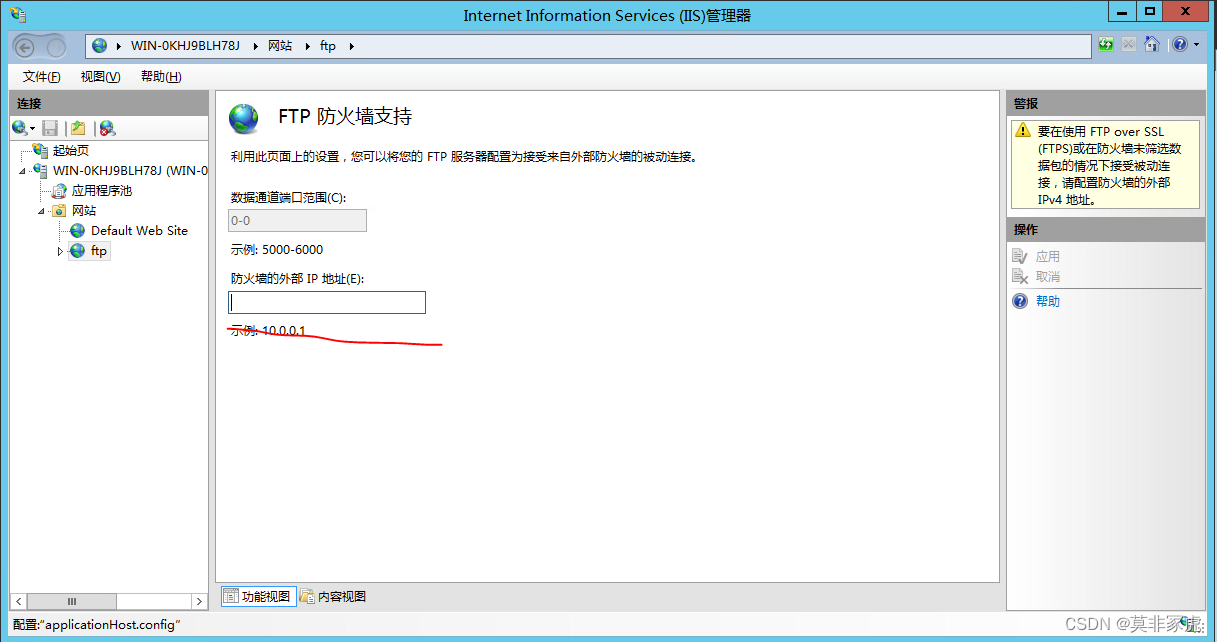
第五步:配置FTP防火墙(如果防火墙关闭,这部分不用配置)
13:双击“FTP防火墙支持”
在“防火墙的外部IP地址”栏中输入Windows服务器的公网IP地址,然后点击“应用”—“确定”
我这里没有公网IP地址,所以这部就不设置了。
第六步:客户端测试
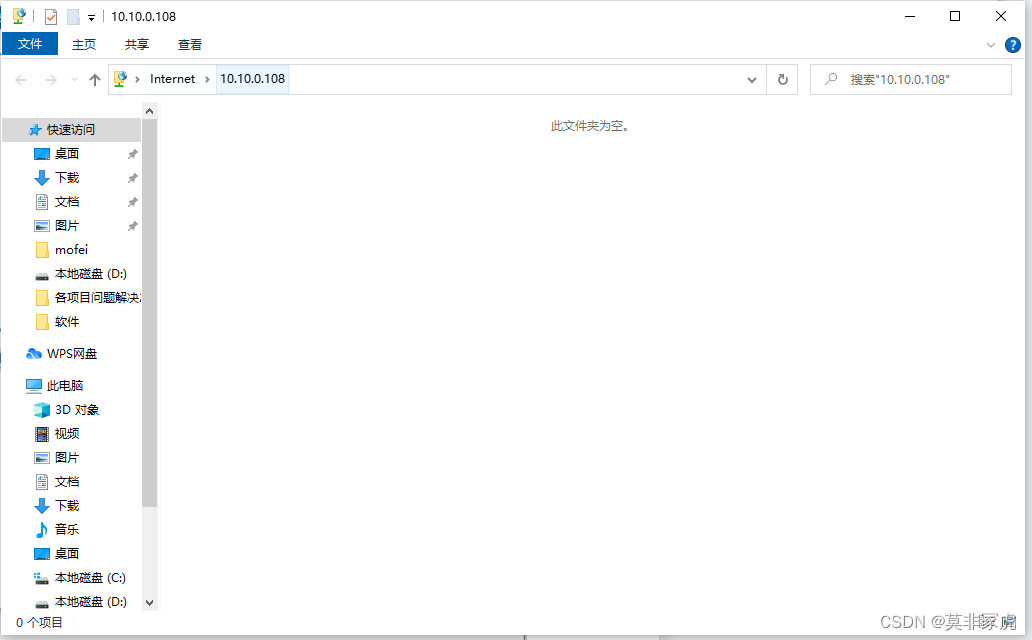
14:打开文件夹目录,在里面输入地址 ftp://IP:21/

15:输入刚刚创建的Windows账号密码

登录成功 配置完成