华硕Z690怎么组建与删除RAID? 华硕主板BIOS设置RAID阵列的技巧
由于华硕Z690系列主板组RAID的BIOS设置选项与之前旧系列主板会些差异,因此有些用户不知道怎么设置,这篇文章是本站给大家带来的华硕Z690组建RAID阵列方法。
注意:无论建立或是删除RAID,原硬盘内数据皆会被删除,请在执行操作前确认硬盘内所有重要数据皆已备份或转移。一旦执行建立或删除RAID后,原先硬盘内数据则无法再恢复。
以PRIME Z690M-PLUS D4主板为例
1、电脑重启或开机,也就是在出现华硕LOGO的时候,连续按进入BIOS的热键,比如【Delete】键,进入BIOS设置下的【EZ Mode】,在【Storage Information】字段确认连接的储存装置可被识别;

2、按键盘上的【F7】键,进入【Advance Mode】;
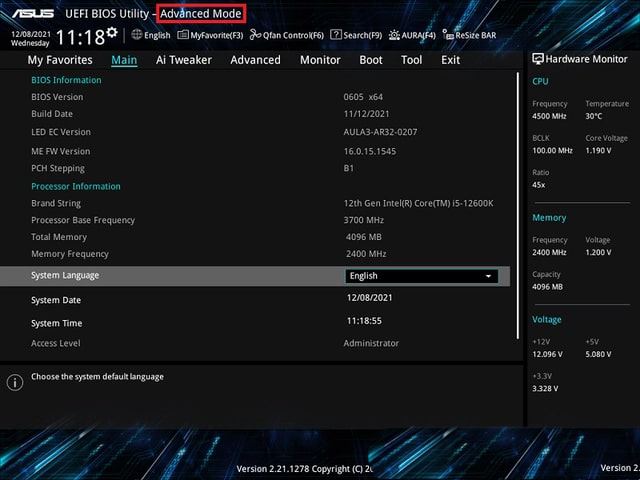
如果进入的是BIOS Advance Mode,则无需再按F7键。
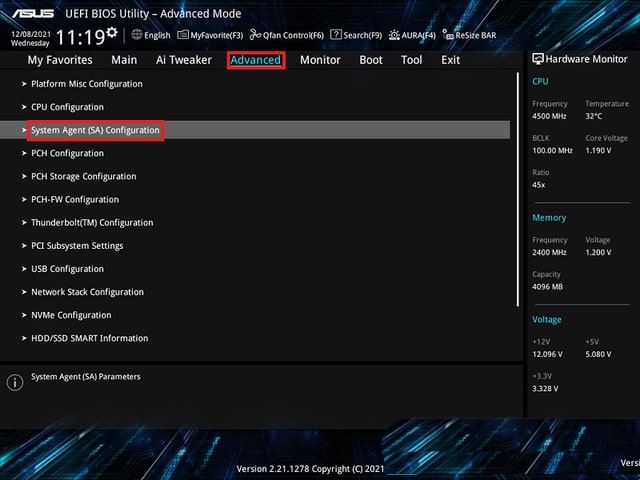
3、依次点击【Advanced > System Agent (SA)Configuration】;
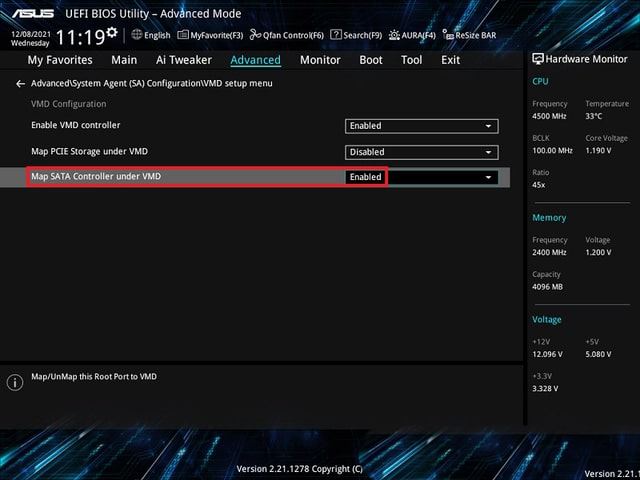
4、点击并选择【VMD setup menu】;

5、如果连接的存储装置为SATA设备,请将【Map SATA Controller under VMD】选项设置为【Enabled】
如果连接的存储装置为PCIE设备,请将【Map PCIE Storage under VMD】选项设置为【Enabled】
以SATA设备为例,将【Map SATA Controller under VMD】选项设置为【Enabled】
6、按键盘上的【F10】键,点击【Ok】,保存选项,计算机将自动重启;

7、计算机重启后,也就是在出现华硕LOGO的时候,连续按进入BIOS的热键,比如【Delete】键,进入BIOS设置下的【EZ Mode】,Storage Information 下已显示为RAID模式;

8、按键盘上的【F7】键,进入【Advance Mode】;

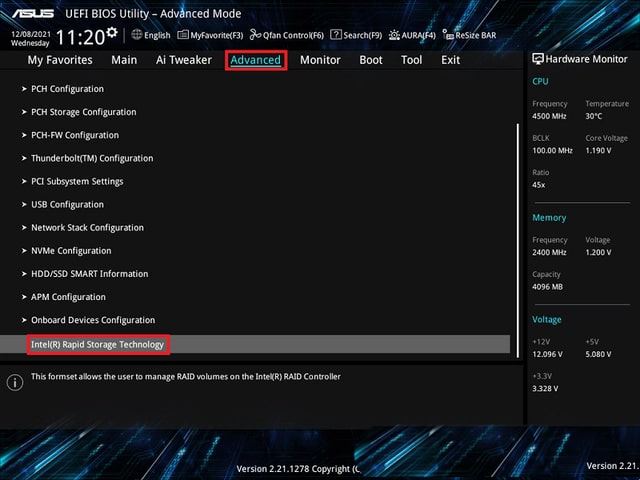
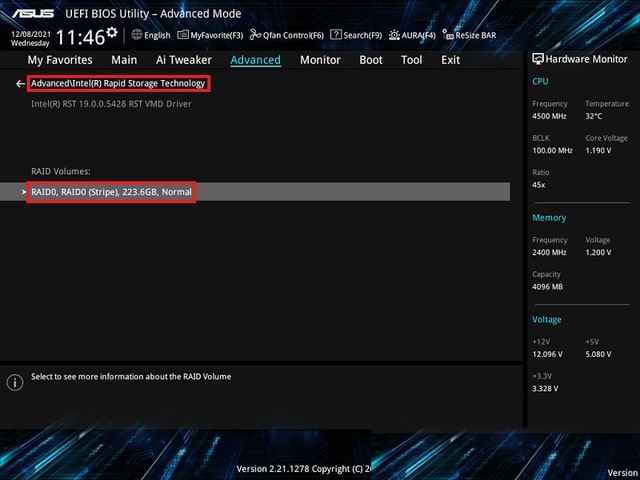
9、依次点击【Advanced >Intel(R) Rapid Storage Technology】;
10、点击并选择【Create RAID Volume】;

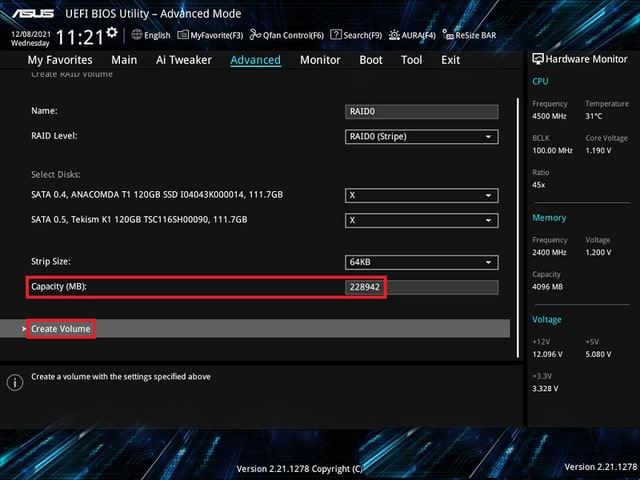
11、在Name的提示框中设置RAID扇区名称:如【SATARAID】
在RAID Level的提示框中选择您想要的RAID层级:如【RAID0(Stripe)】
在Select Disk的提示框中,点选需要组RAID的硬盘装置并设置为【X】

12、在Capacity (MB)的提示框中输入您要的陈列容量,并点击选择【Create Volume】,完成RAID组建;
Q:安装Windows 11操作系统时如何安装RAID控制器驱动程序?
A:请依照下列步骤来将Windows 11操作系统安装时安装RAID控制器驱动程序:
1、使用Windows 11操作系统安装光盘以启动计算机。您可以依照窗口操作画面开始安装Windows 11
2、当出现安装类型选项时,点击并选择【自定义:只安装Windows(进阶)】

3、点击并选择【加载驱动程序】;

4、对话框为提醒您插入含有RAID控制器驱动程序的安装媒体,点击并选择【浏览】以进行下一步
a、如果您的系统中只有一个光驱,请先取出Windows操作系统安装光盘,并更换为主板驱动程序与应用程序光盘
b、如果您没有光驱,您可以使用另一台有光驱的计算机,将驱动程序与应用程序光盘中的RAID驱动程序复制到U盘

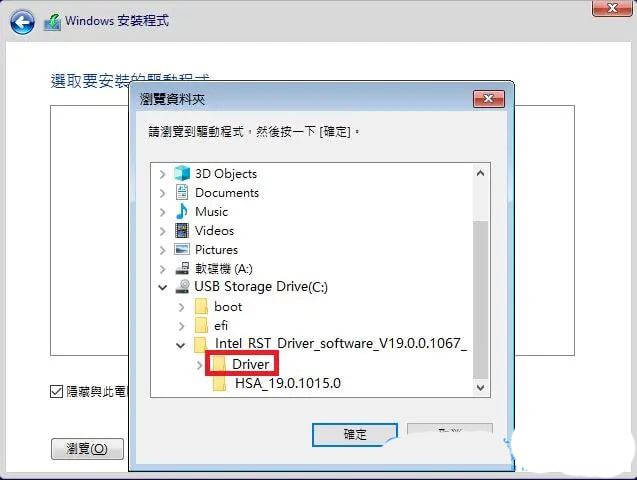
5、找到主板驱动程序与应用程序光盘中的【Intel_RST_Driver】驱动程序文件夹后,点击并现在【Driver】,再点击【OK】,进行下一步,即可完成安装RAID驱动程序;
Q:如何删除已组建的RAID?
A:1、进入【Adcanced\Intel(R) Rapid Storage Technology】选项,选择您想要删除的【RAID】,然后按【Enter】键
2、Delete提示对话框中,按【Enter】键

3、再选【Yes】,以删除RAID设置