U盘UEFI硬装WIN8.1 64位专业系统,是怎样练成的
本次测试目的:解决3TB以上的大硬盘(包括3TB)以及特殊的SSD的UEFI装系统的问题
在传统MBR硬盘模式,只能最大支持2TB的硬盘。所以3TB(以上)大硬盘就必须用GPT。
本次装系统的盘是SSD,采用UEFI装系统,依旧只分一个区。
目前很多帖子只是介绍了系统安装流水不完整,本屌就略补充补充吧。
注意!!!此次装机,主板必须支持UEFI>>>>>>>>>>>>>>>>

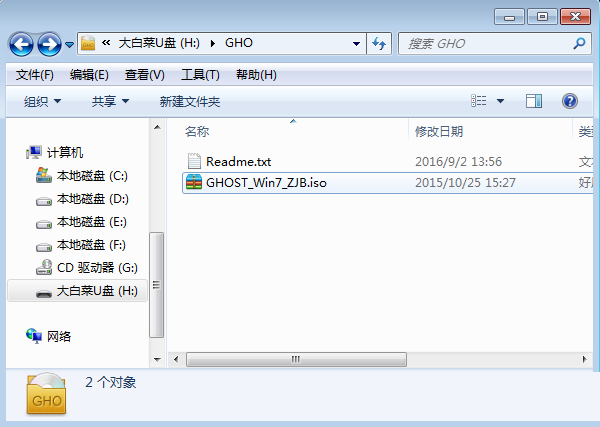
工欲善其事必先利其器,先下载好需要的软件神马。
选择360解压也是比较无奈,是因为另外个“好压”是“2345”,不多说都懂的。
显卡的驱动一般是300M左右的大小,建议先去官网下载最新WHQL(目前是347.88)
备注:在后面的装系统过程中,因为新版本的IT天空驱动包还是带“2345”,修改了IE。
此次用了驱家的精灵带网卡版吧。

很多人会问WIN7 附带WIN8 64位专业版 MSDN 哪有?
自己去msdn。itellyou。cn (句号自己修改)。
附带WIN8 64位专业版 MSDN
ed2k自:/由/哥|file|cn_windows_8_1_pro_vl_x64_dvd_2971907.iso|4032598016|1FDA520B3E8880E2FB00B20439E0826E|/
去掉“自由哥”3字 就是磁力。
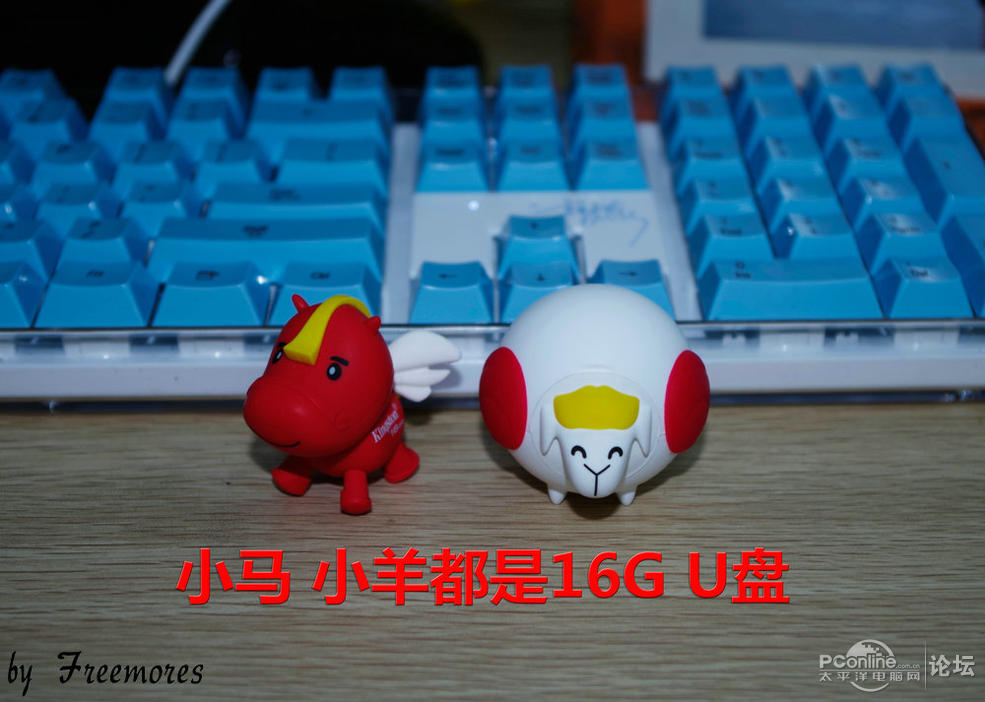
首先准备一个U盘,最好是8G以上容量的,我的小马小羊都是16G的,随便选一个插到电脑。
(现在U盘便宜,不要说木有)
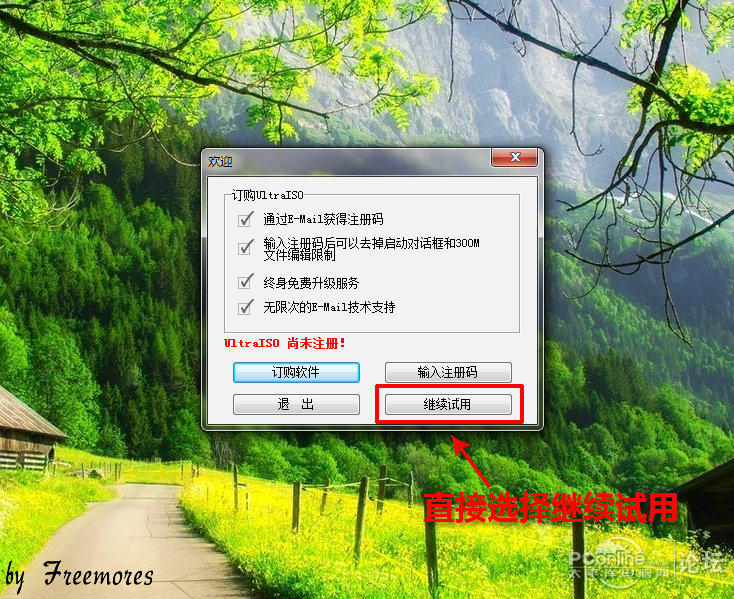
UltraISO是用来引导系统ISO镜像的软件。
点开软件,点“继续试用”,是不影响系统盘的制作的。
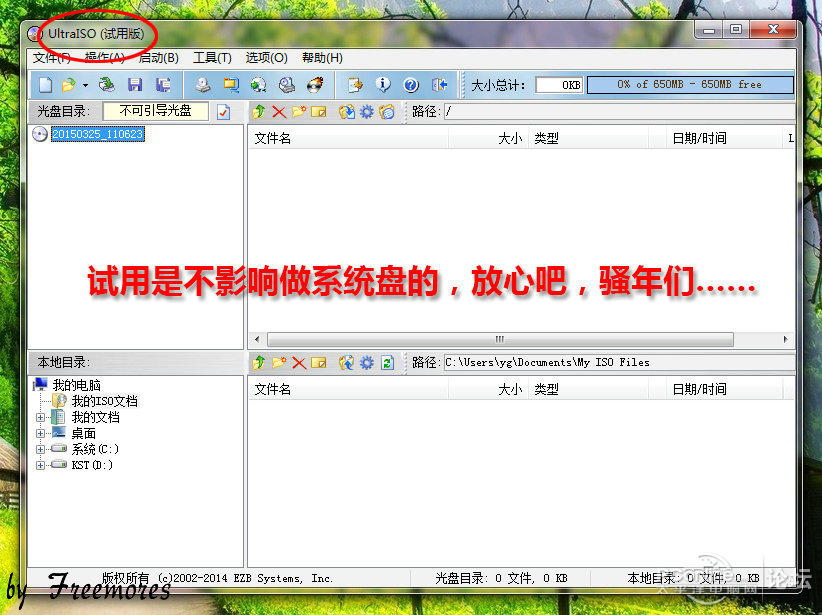
UltraISO软件界面一览

点击右上“文件”菜单下的“打开”按钮
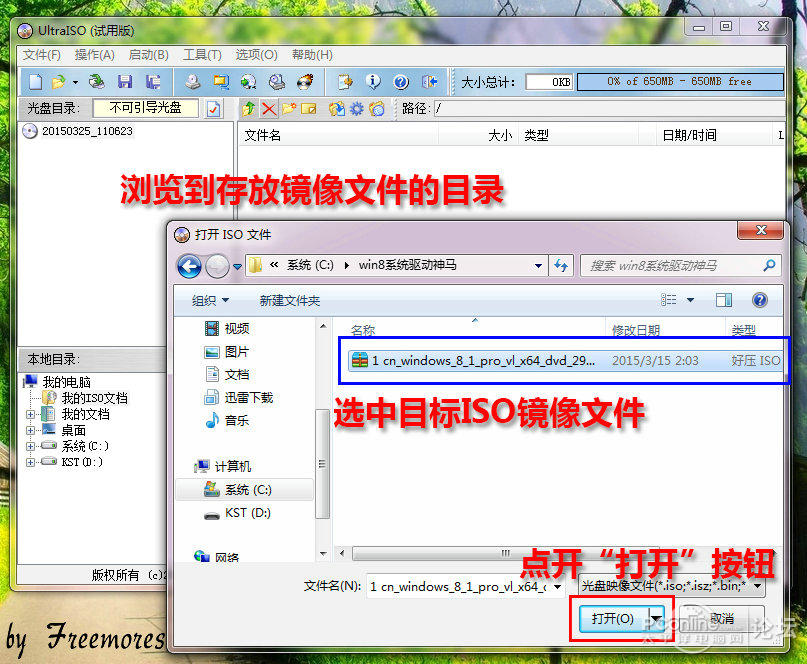
“打开”浏览到存放WIN7 ISO镜像,点击下脚的“打开”按钮

然后在UltraISO上端“启动”菜单下的“写入硬盘映像”
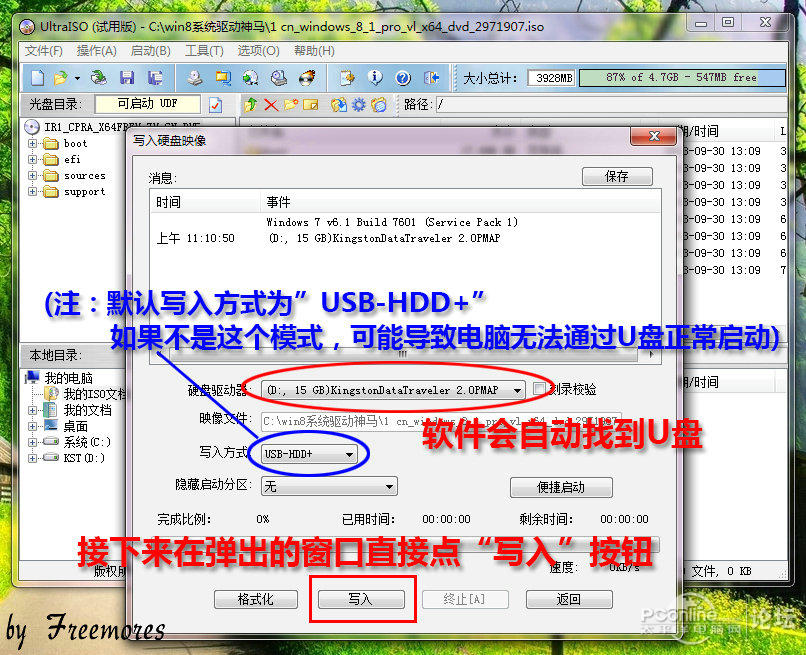
默认写入模式“USB-HDD”, 软件会自己找到U盘(建议操作的时候只插一个U盘)
然后再点下端的“写入”按钮。

当然,一定要在做系统盘的时候备份好资料。我的U盘是空的,点“是”。

制作的过程要花上10几分钟,休息会……

系统盘制作好后,U盘的图标和文字都会有改变。

将之前下好的软件神马丢到U盘里面。

本次系统测试的SSD 是我闲置的金士顿 3K 120G (在安装之前,我将金士顿模拟成新盘)

现在新买的主板SATA模式基本都开启了AHCI模式,
我映泰的板子是“Advanced”--“SATA Configuration”--“AHCI”
因为每个牌子的BIOS不同就不多说神马。开启AHCI 是为了SSD 4K对齐。
另外,需要主板BIOS开启UEFI的启动。
开机按F9进入快捷启动界面,选择UEFI 金士顿U盘。
装系统的主板是映泰,快捷启动是F9。华硕的是F8 技嘉的是F12。
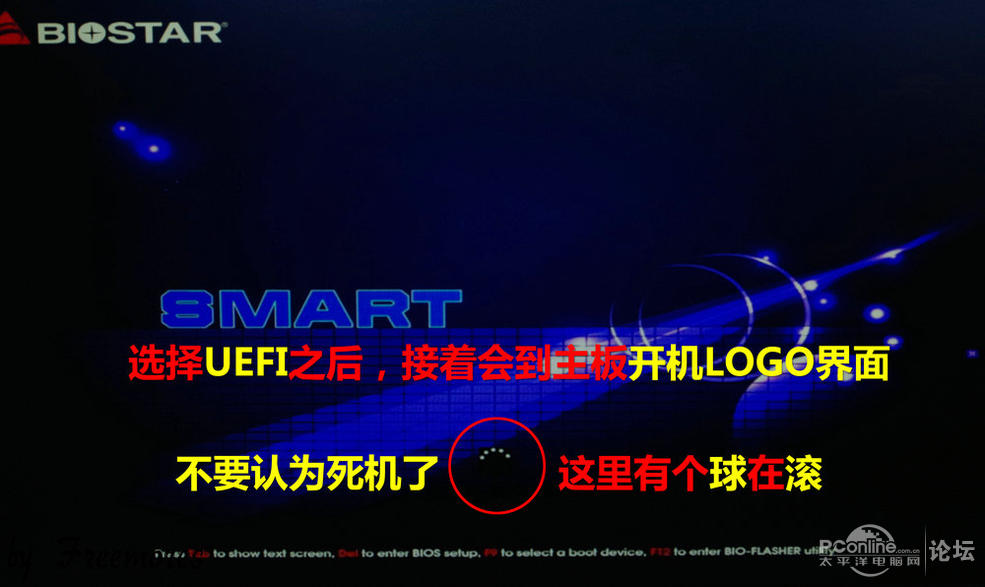
选择UEFI之后,接着会到主板开机LOGO界面,不要认为死机了,等会就会有个“球在滚”。
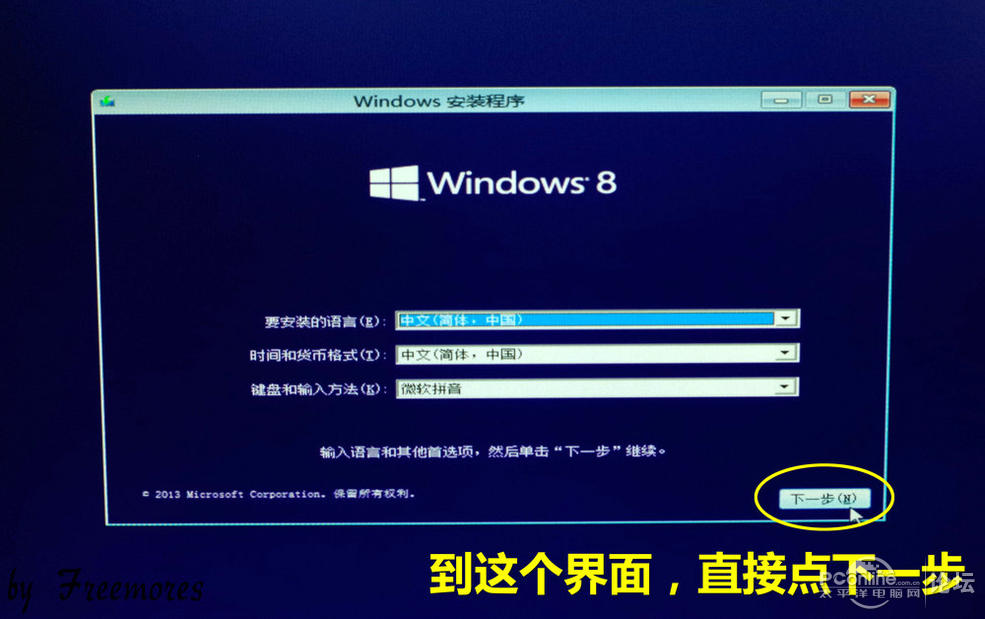
滚动条滚玩之后,进入安装WIN8.1的界面。点下一步。
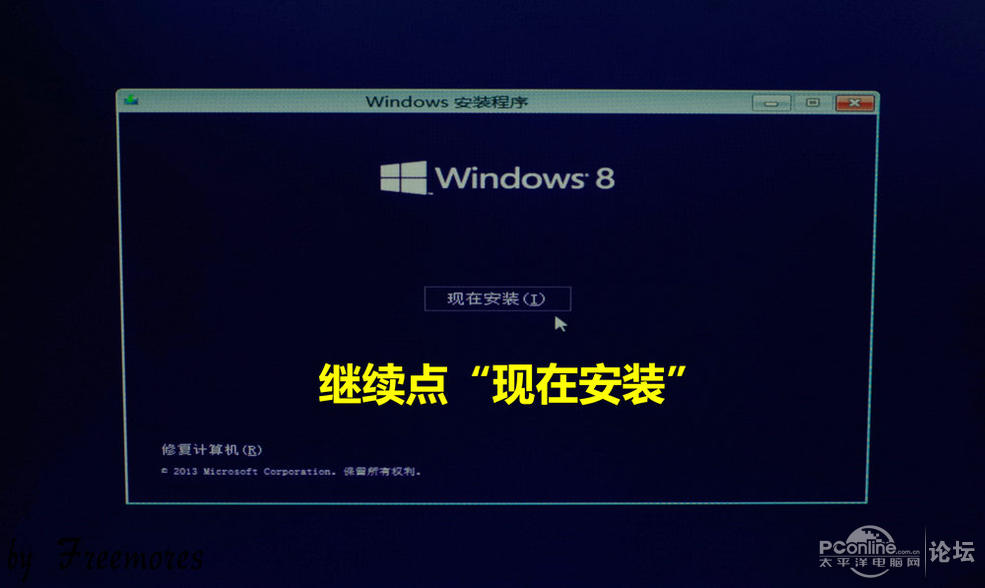
继续点“现在安装”。

需要等一会……

打勾之后,再点下一步。
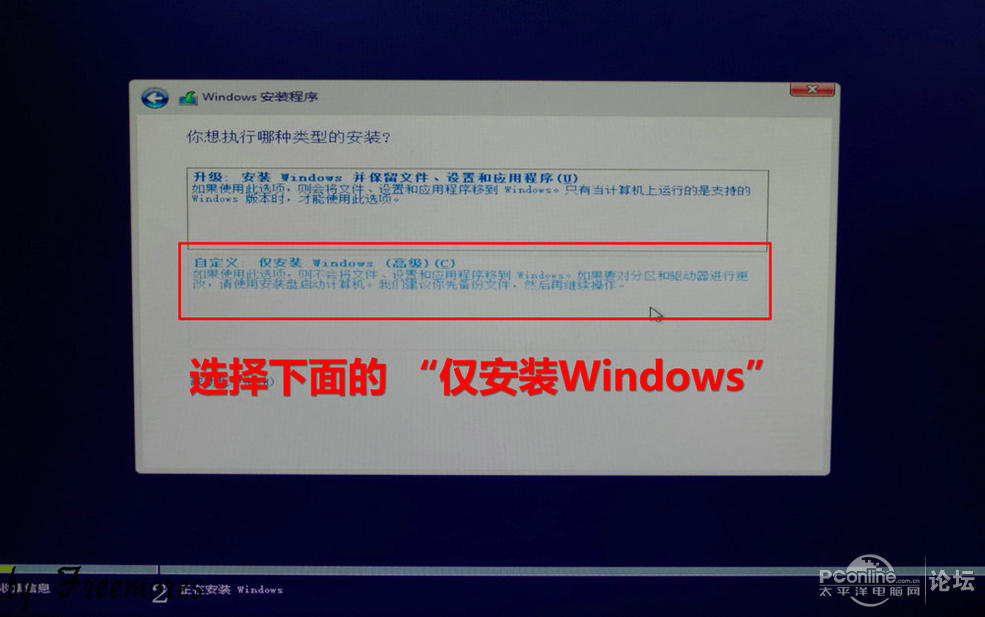
选择下面的“仅安装Windows”
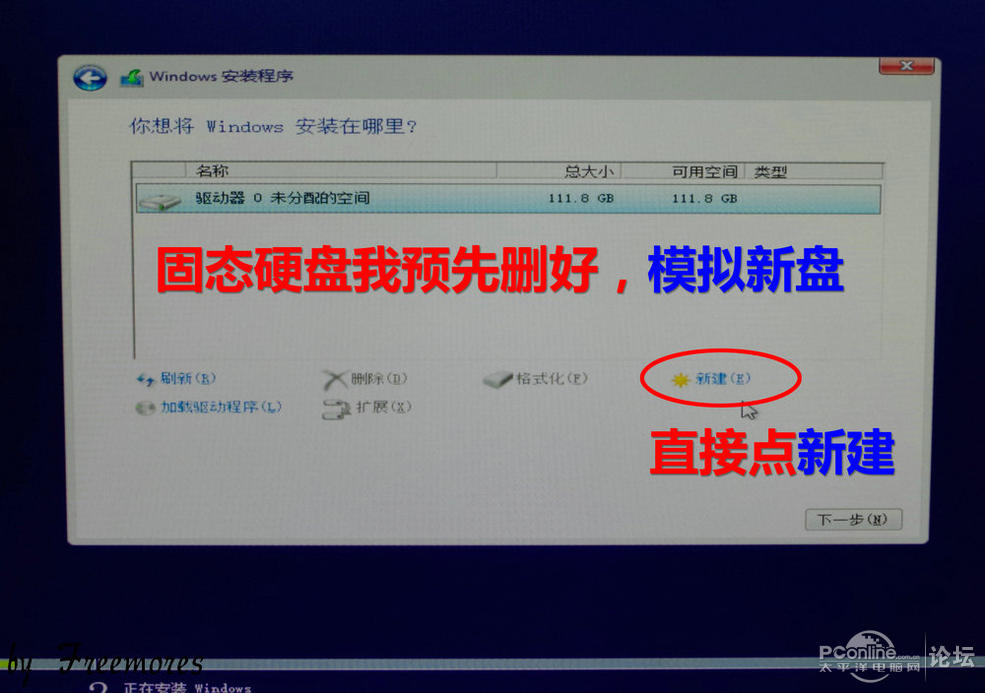
新SSD是这样的,直接点“新建”。
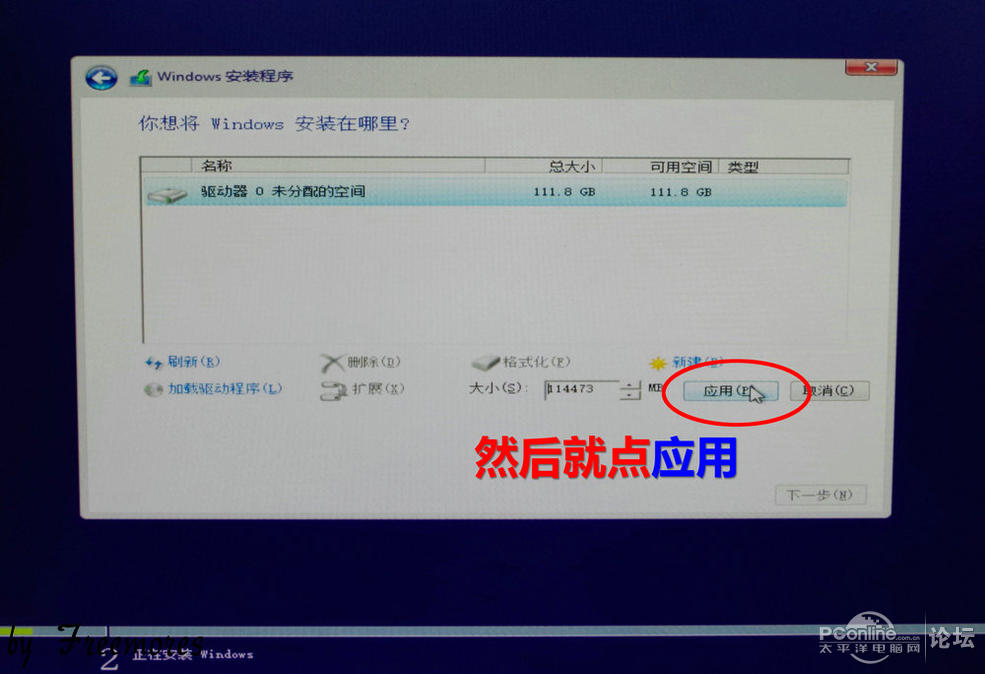
SSD就直接点“应用”分一个区。如果是3TB以上硬盘,大小就自己调整吧。

然后弹出上面的对话框,再点确定。
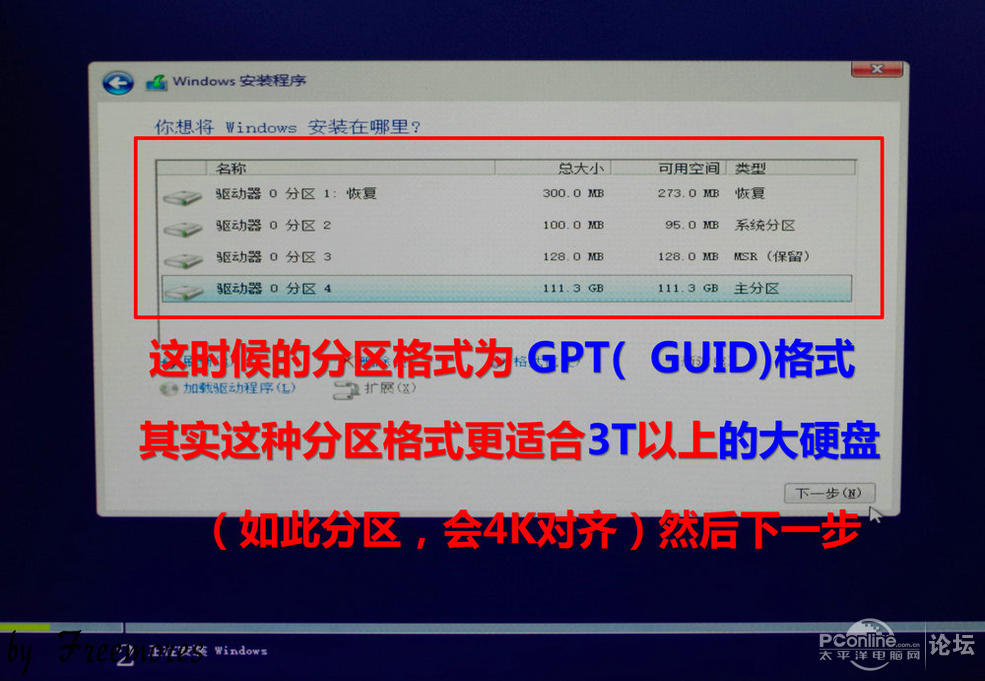
这时候的分区格式即为GPT格式了。继续“下一步”……
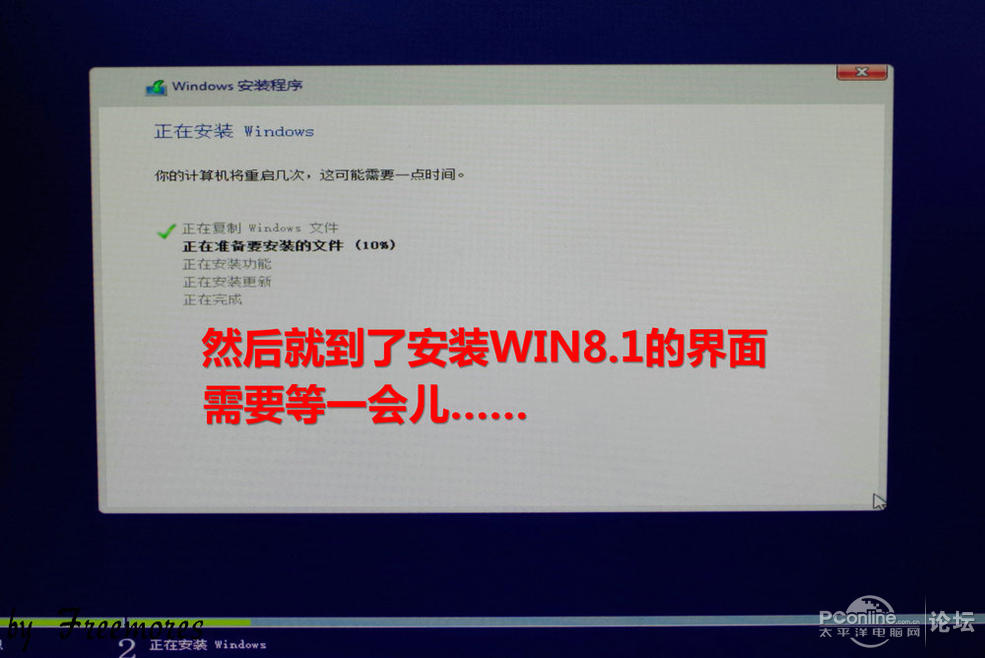
然后到了安装WIN8.1的界面,需要等一会儿……
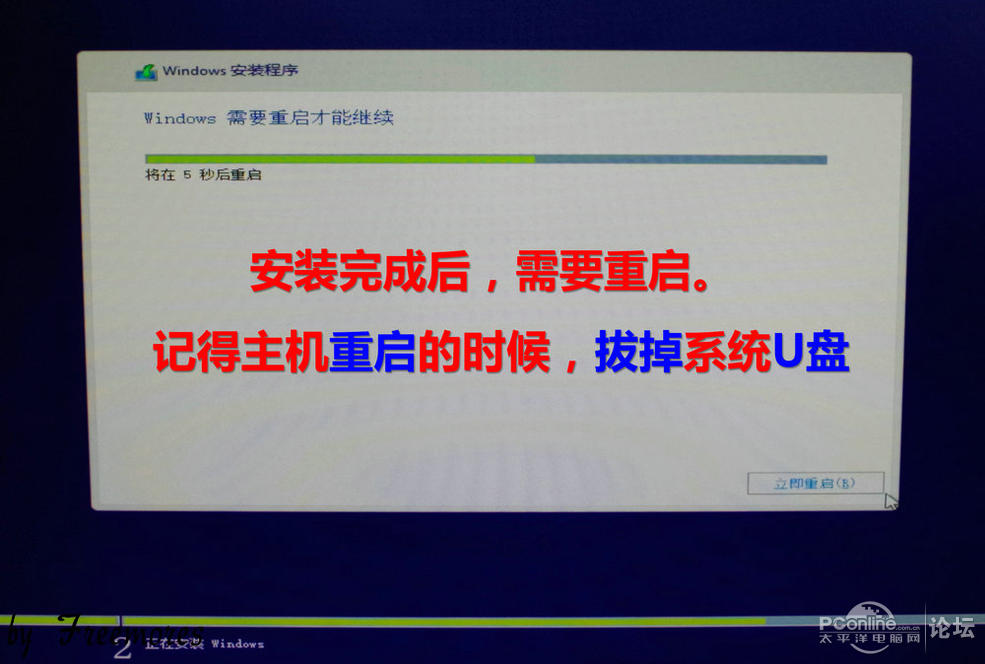
OK之后,就有个10秒重启,记得要拔掉U盘。

重启之后,又到了LOGO界面,继续等一会。
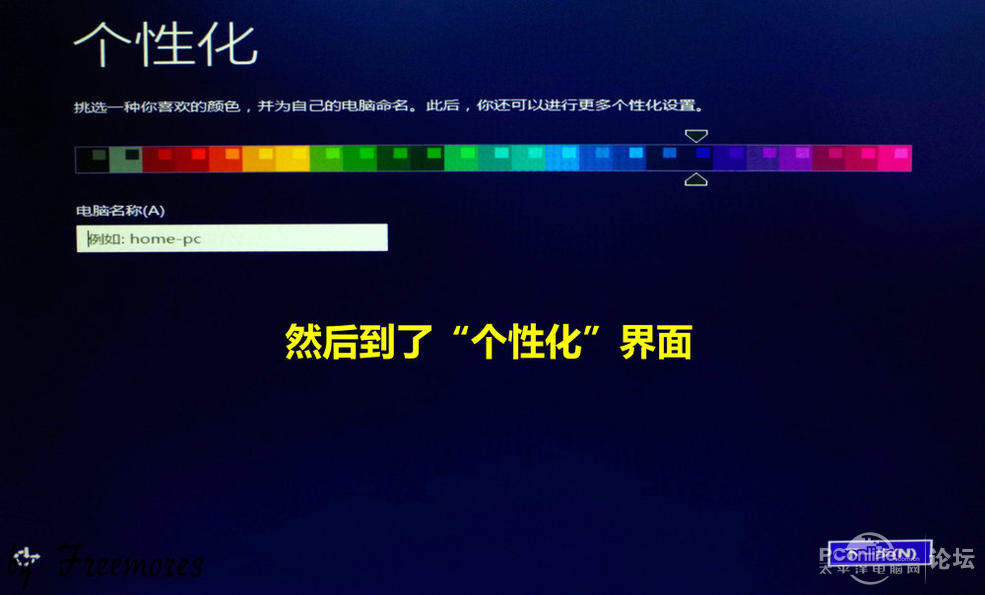
然后到了“个性化”界面。
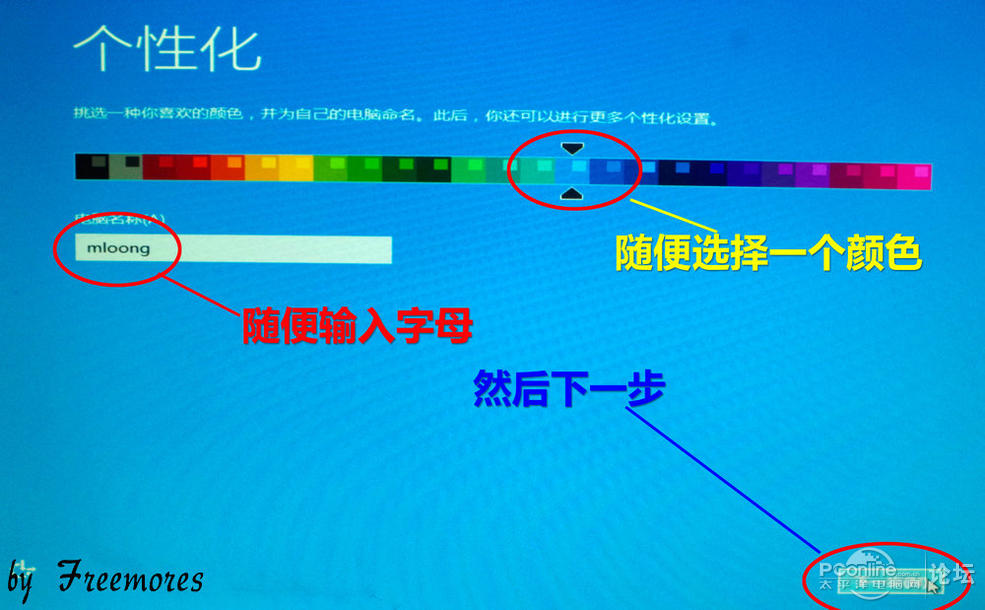
电脑名称随便输入神马,颜色方面我选了浅蓝,然后“下一步"。
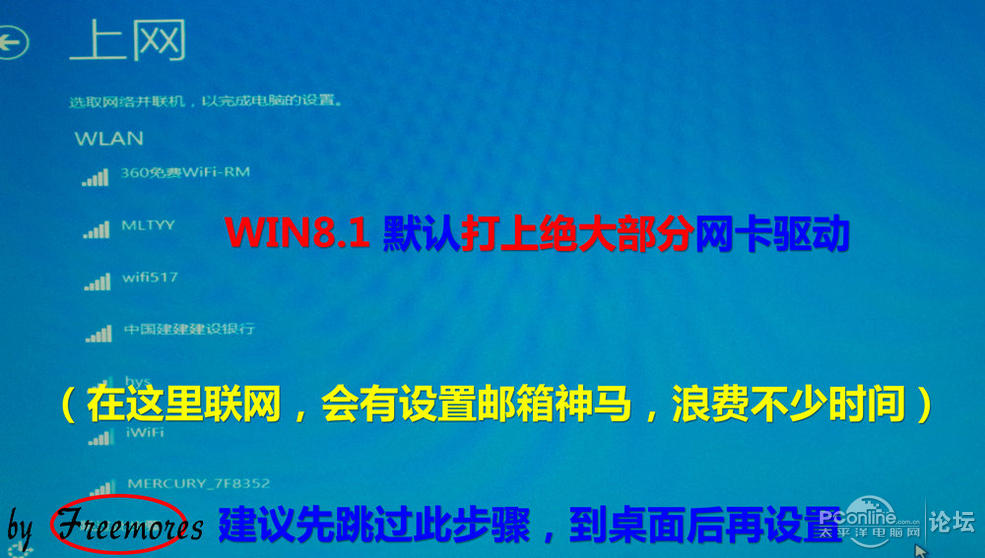
WIN8.1 能默认打上绝大部分网卡驱动(我用的无线网卡)就是这个界面了。
不建议联网,不然会要出现设置邮箱神马。直接跳过此设置。
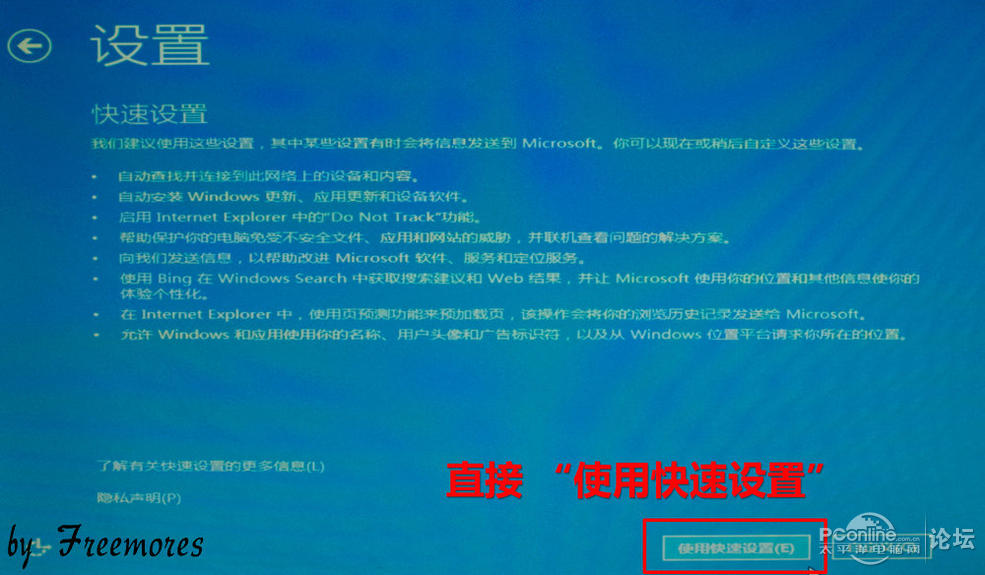
直接“使用快速设置”。
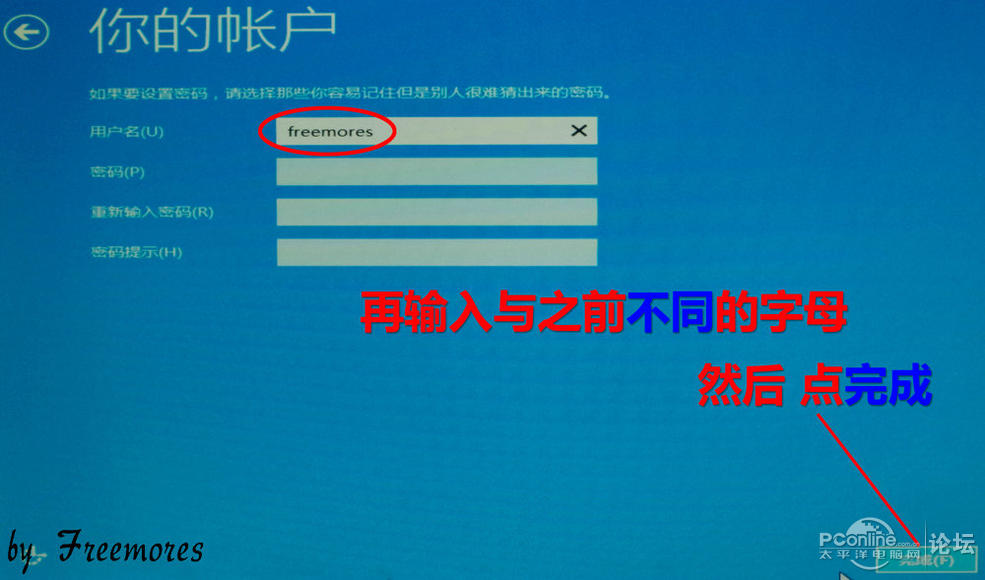
用户名继续随便输入神马,然后点完成。

之后会黑屏一会,是正常的。
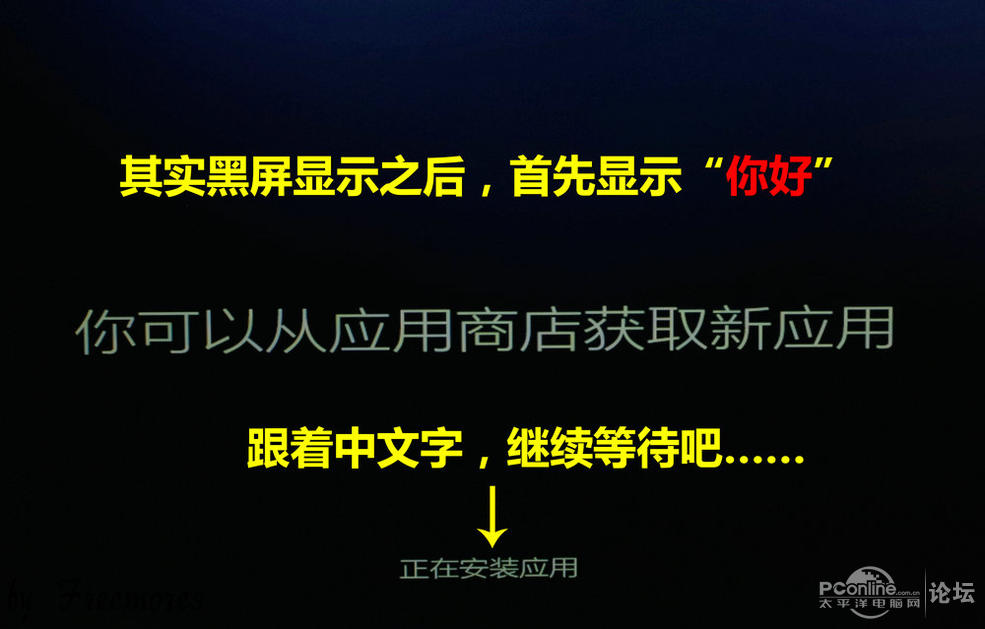
首选显示是“你好”,没有拍到。
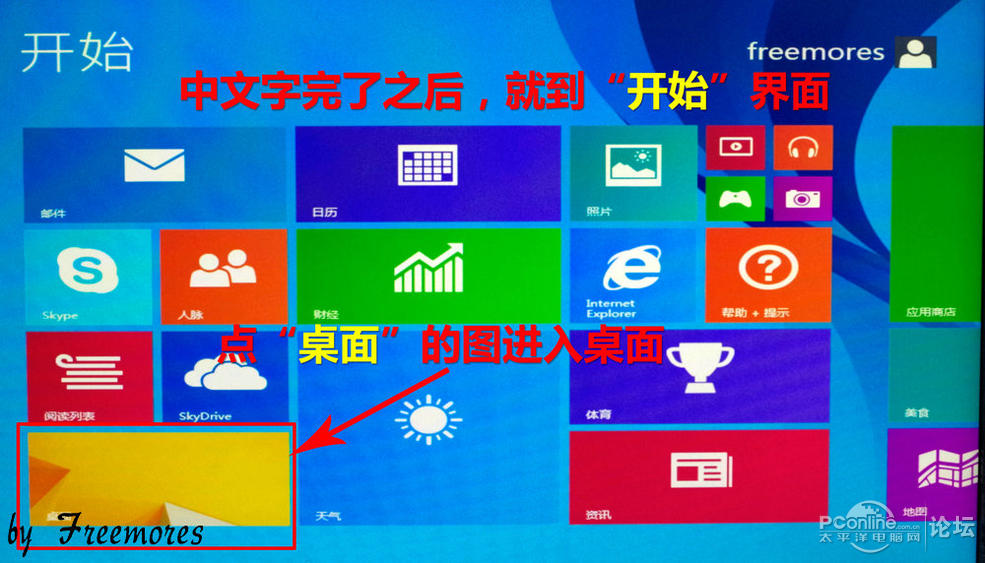
等好了,就到了系统的开始界面,点“桌面”图标进入界面。

硬装版的桌面,会发现只有一个“回收站”。

将“计算机”在桌面上显示的步骤:
1. 右键桌面“个性化”
2. 选择“更改桌面图标”
3. 选择“计算机”
4. 点“确定”,即完成设置。
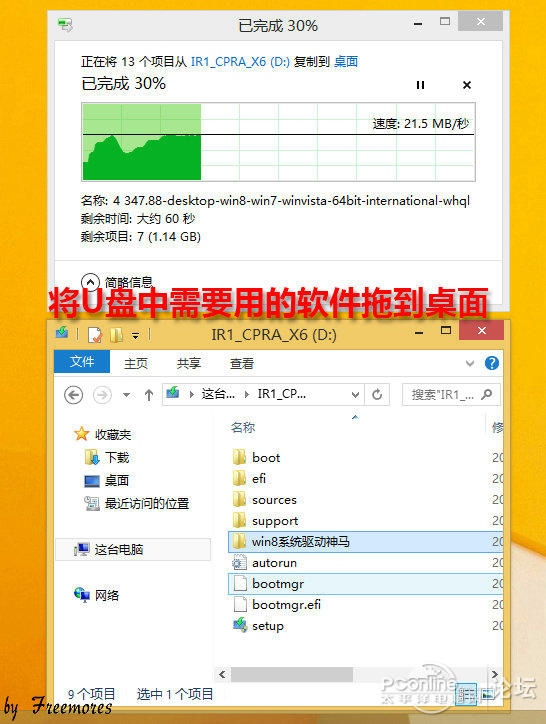
将要安装的软件丢到桌面。
并安装解压软件,原版系统不带解压软件。

弹出的窗口如果不设置的话,每次安装软件都会弹出,干掉之。
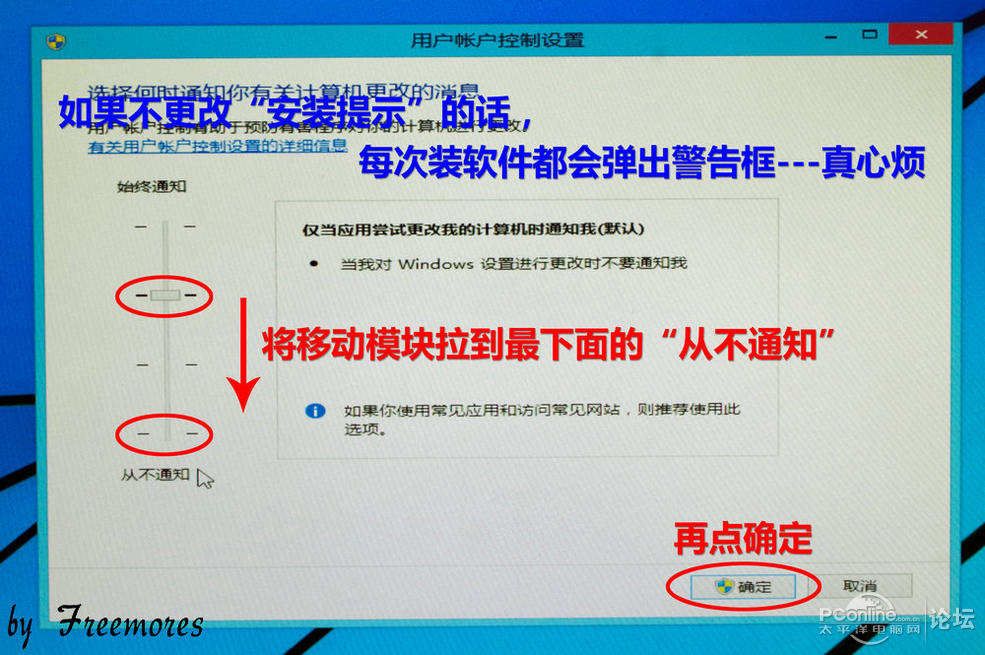
点开警告界面,就爱那个移动模块下拉到“从不通知”,再点“确定”,就OK了。
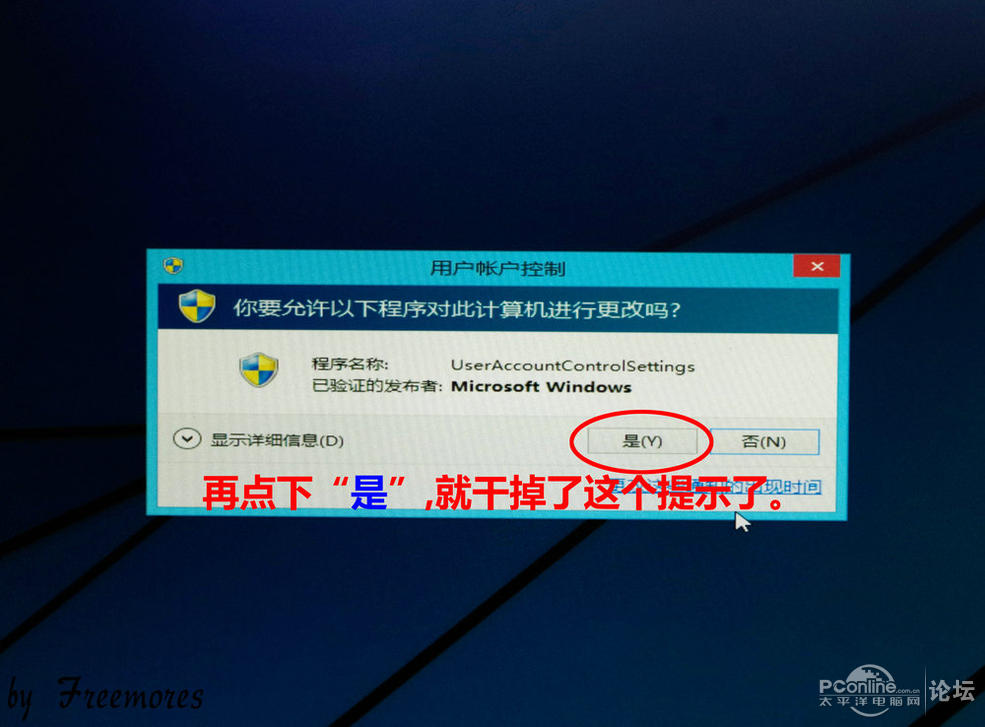
然后弹出的对话框,点是,就不再弹了。

继续安装解压软件,就再也不会弹弹弹了。
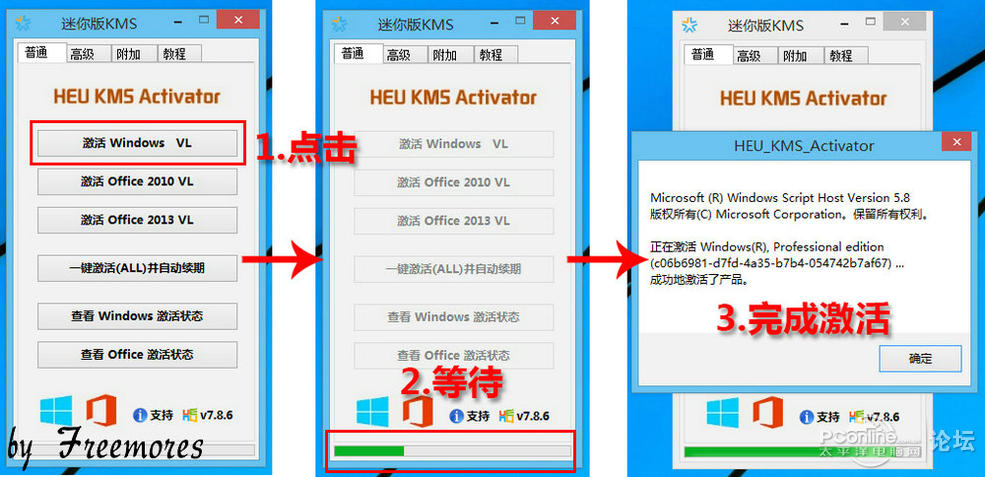
本次激活我用的是KMS.
1.点击“激活Windows VL”
2.等待……
3.完成激活。
注意: KMS激活只能用3个月,到期后可以再点“意见激活(ALL)并自动续期”。

激活其实很简单,怕麻烦的话,就买正版吧。必须要推荐正版。
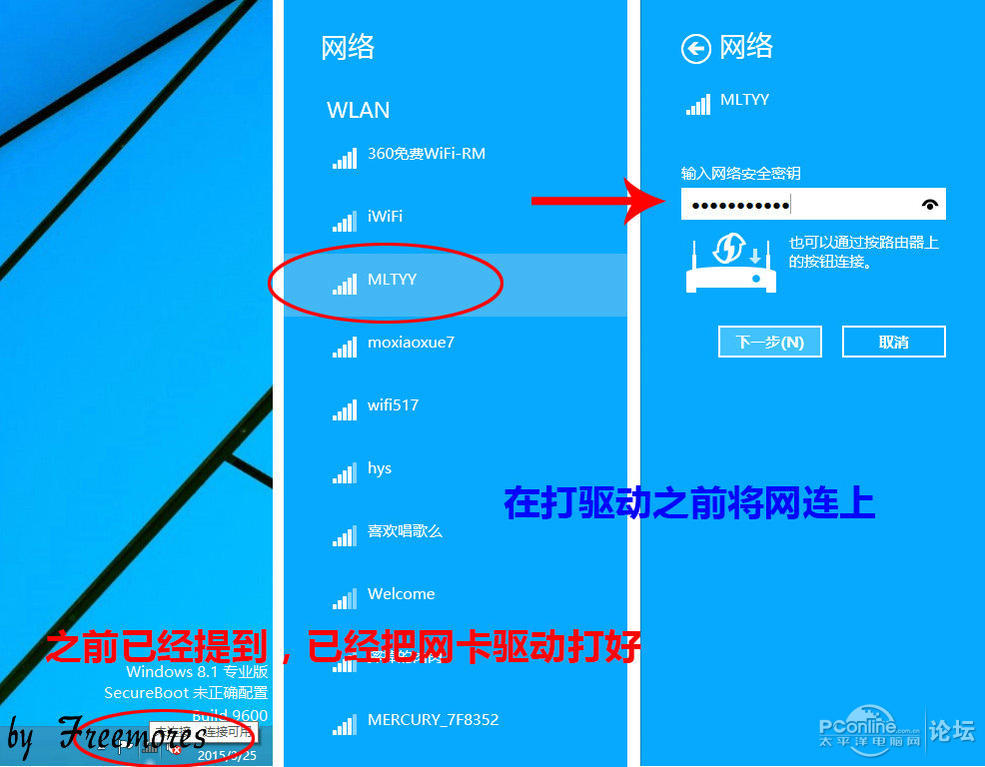
之前有提到网卡驱动已经打好,就先联网。
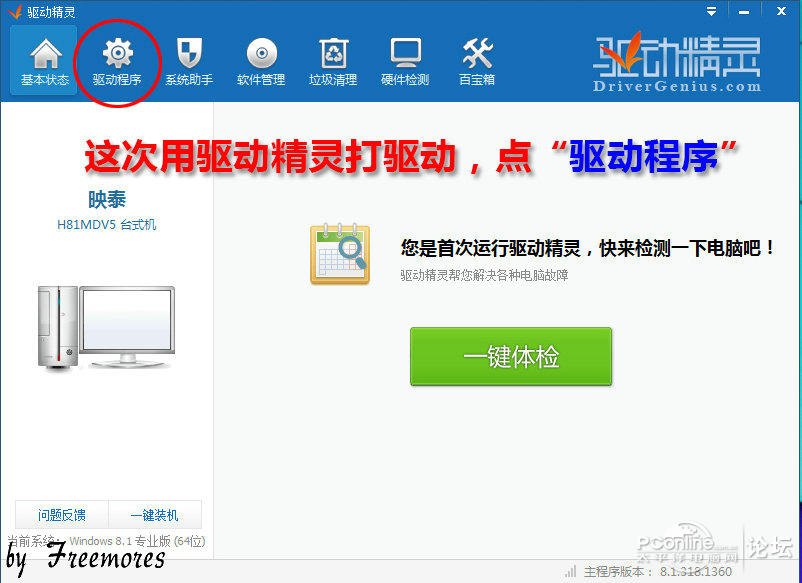
之前装WIN7,发现最新的IT天空包安装之后,我发现IE被2345了。所以这次用了驱动精灵。

我的显卡驱动已经先下好,就联网打别的驱动。
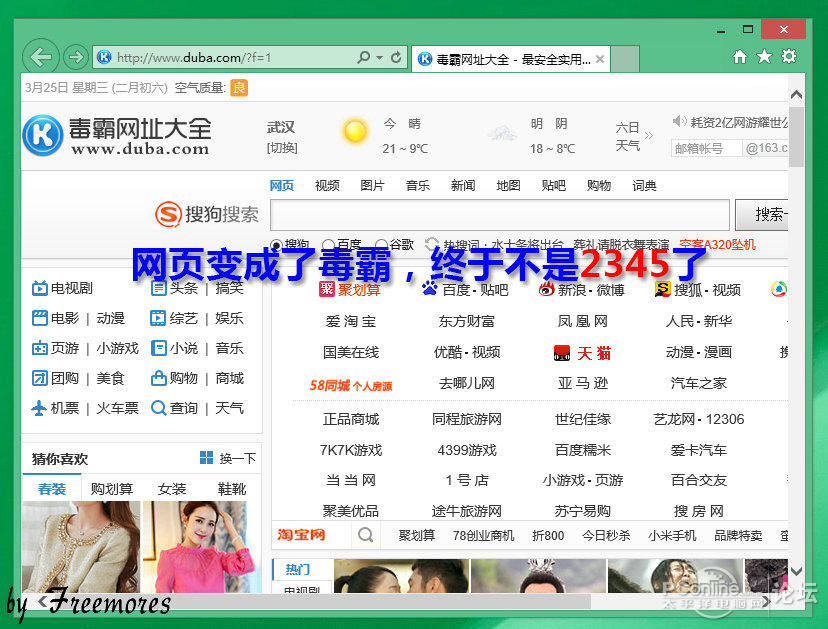
IE然后被毒霸了,驱动精灵和金山是有一腿的。
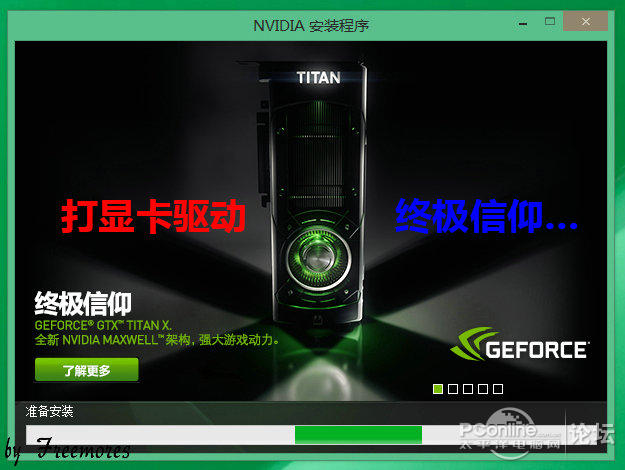
打显卡驱动,TTX是终极信仰,好吧。
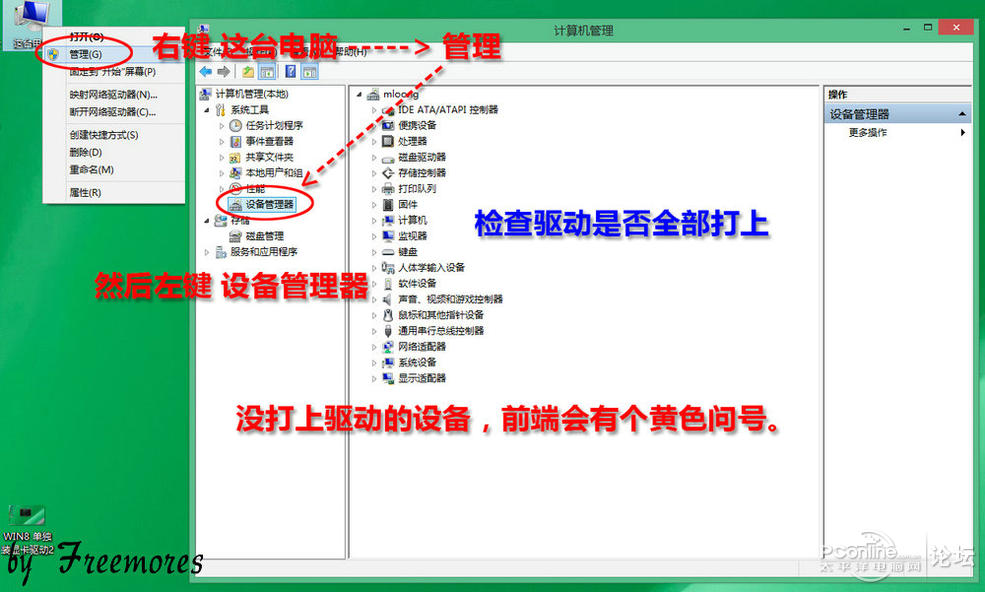
右键“计算机”——“管理”——“设备管理器”
如果有黄色的提示,就是驱动没打完。上图就是都装好的图。
如果驱动精灵打不上,可以用鲁大师。

右键“计算机”——“管理”——“设备管理器”
如果有黄色的提示,就是驱动没打完。上图就是都装好的图。
如果驱动精灵打不上,可以用鲁大师。

输入法的设置就看上图吧。
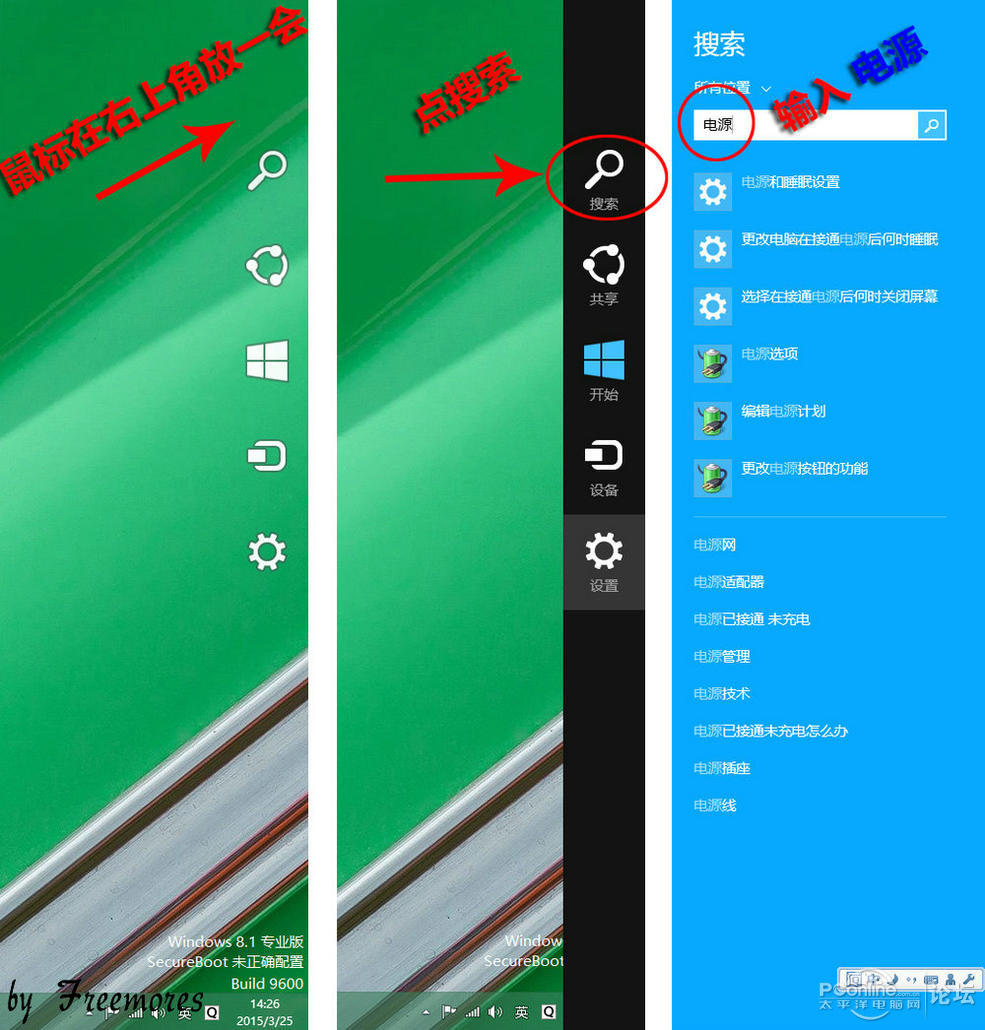
设置电源神马就看上图找搜索吧。

根据自己的需求调整屏幕与电脑休眠神马。
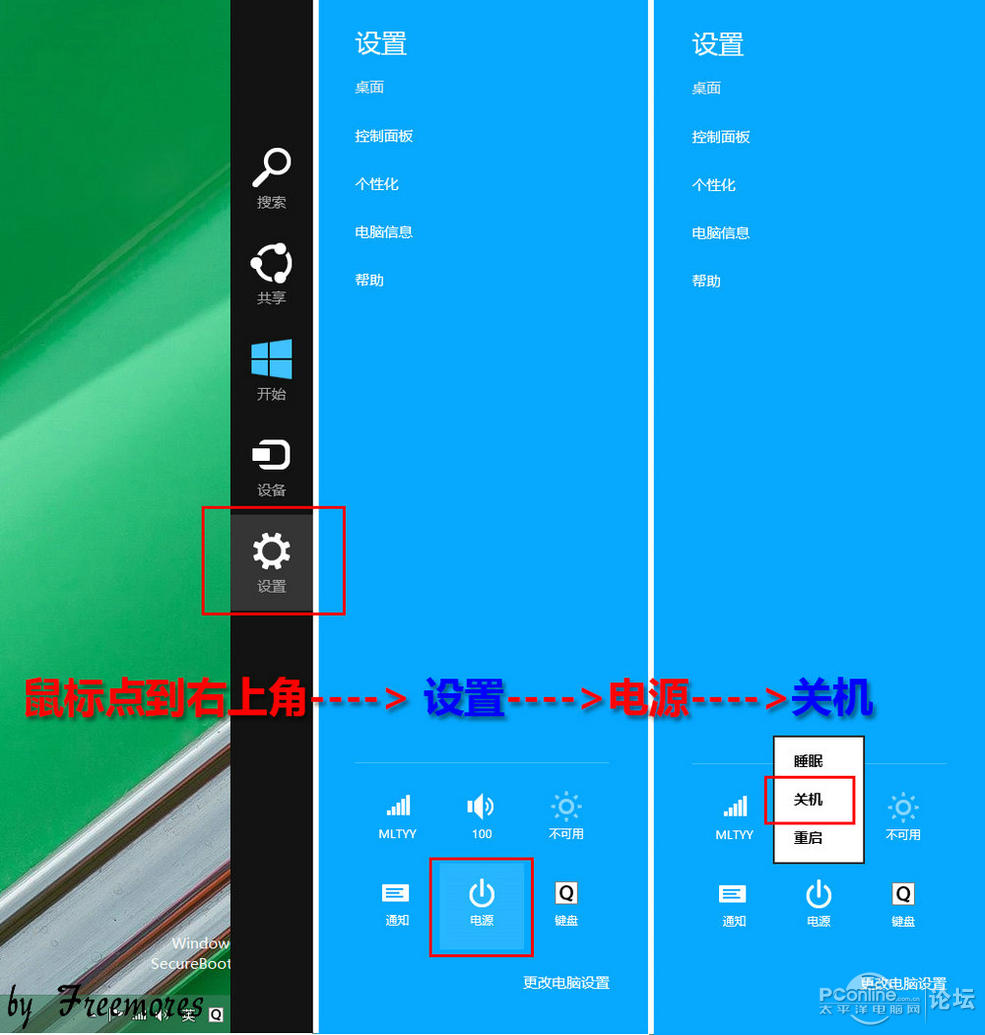
WIN8.1找关机是很郁闷的
鼠标点右上角→设置→电源→关机。

然后就是ASS SSD 检查SSD 是否4K对齐了。2个绿色的OK 就说明弄好了。
蛋疼的人就开始点START 测试吧。
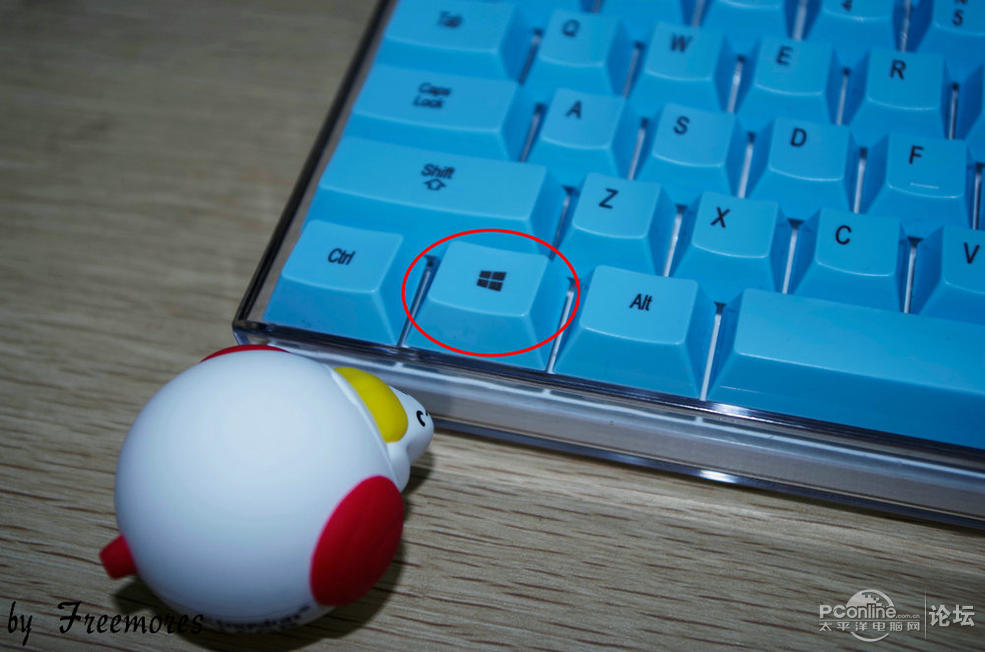
玩WIN8.1 要习惯用WINDOWS键。
蛋疼的UEFI就完成了(3TB以上装系统的人就是折腾,不知道上个SSD么)。
在传统MBR硬盘模式,只能最大支持2TB的硬盘。所以3TB(以上)大硬盘就必须用GPT。
本次装系统的盘是SSD,采用UEFI装系统,依旧只分一个区。
目前很多帖子只是介绍了系统安装流水不完整,本屌就略补充补充吧。
注意!!!此次装机,主板必须支持UEFI>>>>>>>>>>>>>>>>
工欲善其事必先利其器,先下载好需要的软件神马。
选择360解压也是比较无奈,是因为另外个“好压”是“2345”,不多说都懂的。
显卡的驱动一般是300M左右的大小,建议先去官网下载最新WHQL(目前是347.88)
备注:在后面的装系统过程中,因为新版本的IT天空驱动包还是带“2345”,修改了IE。
此次用了驱家的精灵带网卡版吧。
很多人会问WIN7 附带WIN8 64位专业版 MSDN 哪有?
自己去msdn。itellyou。cn (句号自己修改)。
附带WIN8 64位专业版 MSDN
ed2k自:/由/哥|file|cn_windows_8_1_pro_vl_x64_dvd_2971907.iso|4032598016|1FDA520B3E8880E2FB00B20439E0826E|/
去掉“自由哥”3字 就是磁力。
首先准备一个U盘,最好是8G以上容量的,我的小马小羊都是16G的,随便选一个插到电脑。
(现在U盘便宜,不要说木有)
UltraISO是用来引导系统ISO镜像的软件。
点开软件,点“继续试用”,是不影响系统盘的制作的。
UltraISO软件界面一览
点击右上“文件”菜单下的“打开”按钮
“打开”浏览到存放WIN7 ISO镜像,点击下脚的“打开”按钮
然后在UltraISO上端“启动”菜单下的“写入硬盘映像”
默认写入模式“USB-HDD”, 软件会自己找到U盘(建议操作的时候只插一个U盘)
然后再点下端的“写入”按钮。
当然,一定要在做系统盘的时候备份好资料。我的U盘是空的,点“是”。
制作的过程要花上10几分钟,休息会……
系统盘制作好后,U盘的图标和文字都会有改变。
将之前下好的软件神马丢到U盘里面。
本次系统测试的SSD 是我闲置的金士顿 3K 120G (在安装之前,我将金士顿模拟成新盘)
现在新买的主板SATA模式基本都开启了AHCI模式,
我映泰的板子是“Advanced”--“SATA Configuration”--“AHCI”
因为每个牌子的BIOS不同就不多说神马。开启AHCI 是为了SSD 4K对齐。
另外,需要主板BIOS开启UEFI的启动。
开机按F9进入快捷启动界面,选择UEFI 金士顿U盘。
装系统的主板是映泰,快捷启动是F9。华硕的是F8 技嘉的是F12。
选择UEFI之后,接着会到主板开机LOGO界面,不要认为死机了,等会就会有个“球在滚”。
滚动条滚玩之后,进入安装WIN8.1的界面。点下一步。
继续点“现在安装”。
需要等一会……
打勾之后,再点下一步。
选择下面的“仅安装Windows”
新SSD是这样的,直接点“新建”。
SSD就直接点“应用”分一个区。如果是3TB以上硬盘,大小就自己调整吧。
然后弹出上面的对话框,再点确定。
这时候的分区格式即为GPT格式了。继续“下一步”……
然后到了安装WIN8.1的界面,需要等一会儿……
OK之后,就有个10秒重启,记得要拔掉U盘。
重启之后,又到了LOGO界面,继续等一会。
然后到了“个性化”界面。
电脑名称随便输入神马,颜色方面我选了浅蓝,然后“下一步"。
WIN8.1 能默认打上绝大部分网卡驱动(我用的无线网卡)就是这个界面了。
不建议联网,不然会要出现设置邮箱神马。直接跳过此设置。
直接“使用快速设置”。
用户名继续随便输入神马,然后点完成。
之后会黑屏一会,是正常的。
首选显示是“你好”,没有拍到。
等好了,就到了系统的开始界面,点“桌面”图标进入界面。
硬装版的桌面,会发现只有一个“回收站”。
将“计算机”在桌面上显示的步骤:
1. 右键桌面“个性化”
2. 选择“更改桌面图标”
3. 选择“计算机”
4. 点“确定”,即完成设置。
将要安装的软件丢到桌面。
并安装解压软件,原版系统不带解压软件。
弹出的窗口如果不设置的话,每次安装软件都会弹出,干掉之。
点开警告界面,就爱那个移动模块下拉到“从不通知”,再点“确定”,就OK了。
然后弹出的对话框,点是,就不再弹了。
继续安装解压软件,就再也不会弹弹弹了。
本次激活我用的是KMS.
1.点击“激活Windows VL”
2.等待……
3.完成激活。
注意: KMS激活只能用3个月,到期后可以再点“意见激活(ALL)并自动续期”。
激活其实很简单,怕麻烦的话,就买正版吧。必须要推荐正版。
之前有提到网卡驱动已经打好,就先联网。
之前装WIN7,发现最新的IT天空包安装之后,我发现IE被2345了。所以这次用了驱动精灵。
我的显卡驱动已经先下好,就联网打别的驱动。
IE然后被毒霸了,驱动精灵和金山是有一腿的。
打显卡驱动,TTX是终极信仰,好吧。
右键“计算机”——“管理”——“设备管理器”
如果有黄色的提示,就是驱动没打完。上图就是都装好的图。
如果驱动精灵打不上,可以用鲁大师。
右键“计算机”——“管理”——“设备管理器”
如果有黄色的提示,就是驱动没打完。上图就是都装好的图。
如果驱动精灵打不上,可以用鲁大师。
输入法的设置就看上图吧。
设置电源神马就看上图找搜索吧。
根据自己的需求调整屏幕与电脑休眠神马。
WIN8.1找关机是很郁闷的
鼠标点右上角→设置→电源→关机。
然后就是ASS SSD 检查SSD 是否4K对齐了。2个绿色的OK 就说明弄好了。
蛋疼的人就开始点START 测试吧。
玩WIN8.1 要习惯用WINDOWS键。
蛋疼的UEFI就完成了(3TB以上装系统的人就是折腾,不知道上个SSD么)。