Windows10搭建ftp服务器的图文教程
本文为大家分享了Windows10搭建ftp服务器图文详细教程,供大家参考,具体内容如下
FTP协议我不过多的赘述,直接上干货:
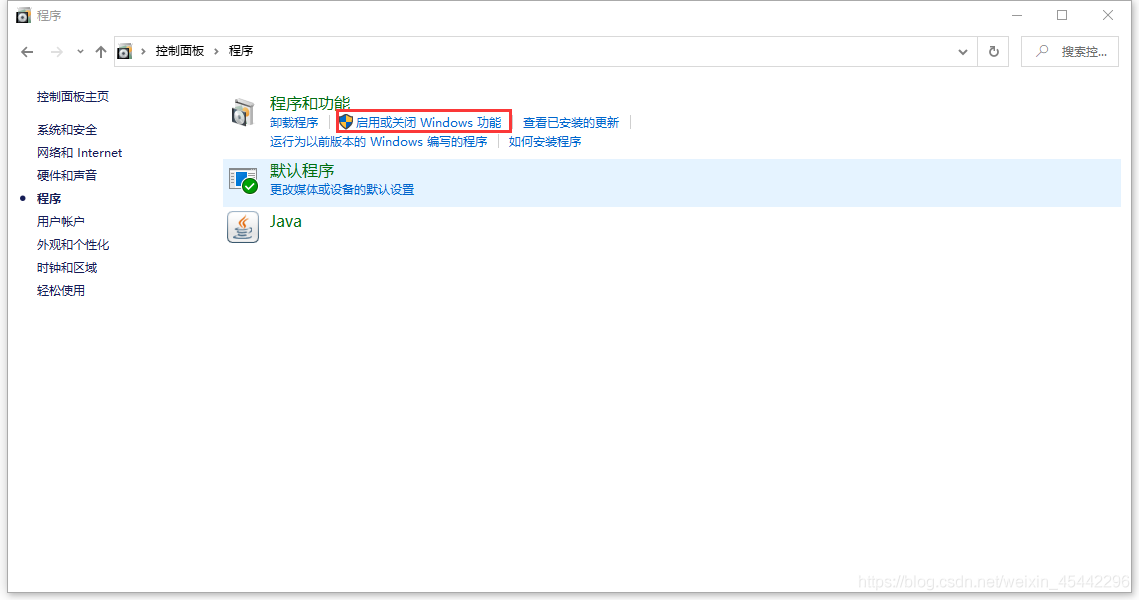
1、首先找到控制面板打开,选择程序

2、在程序打开的窗口中,打开“启动或关闭Windows功能”
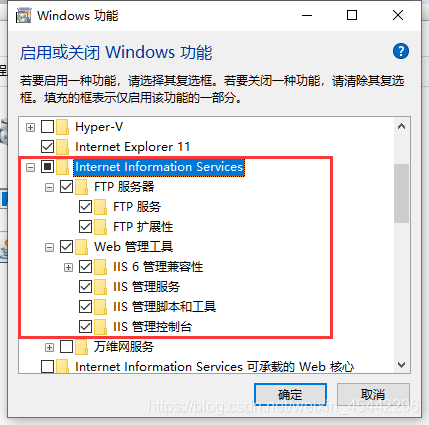
3、找到“Internet Information Service ( Internet信息服务 )”,选中“FTP服务” 和 “Web管理工具”点击确定
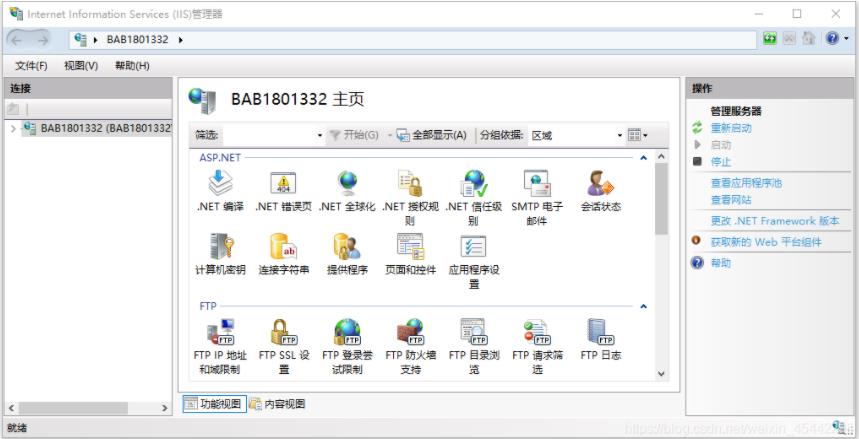
4、在搜索栏数据IIS,打开“Internet Information Service(IIS)管理器”
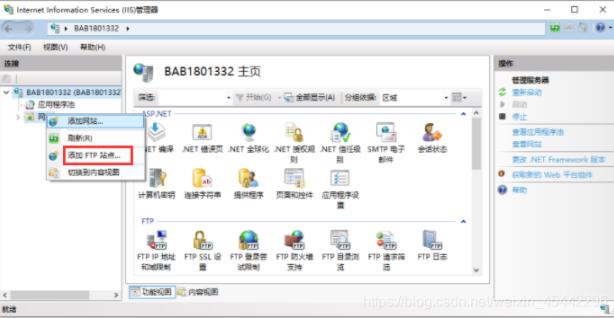
5、右击,点击“添加FTP站点”
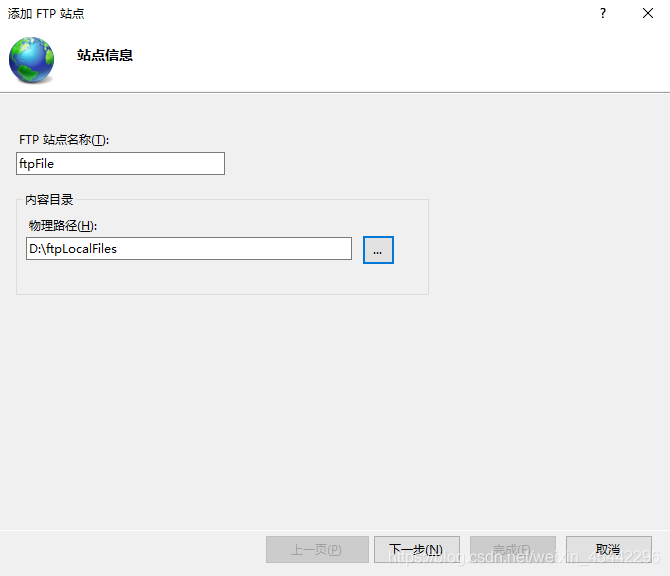
6、自定义站点名,选择站点物理路径,选择下一步
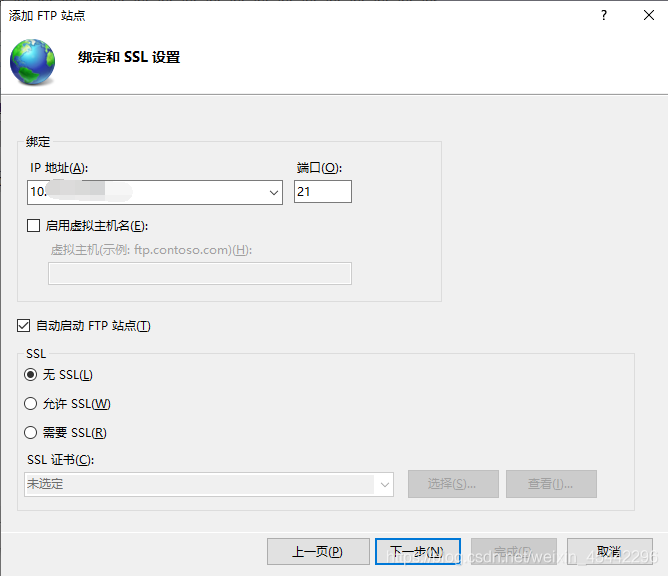
7、选择本机IP地址,端口默认21就可以,选择“无SSL”,下一步
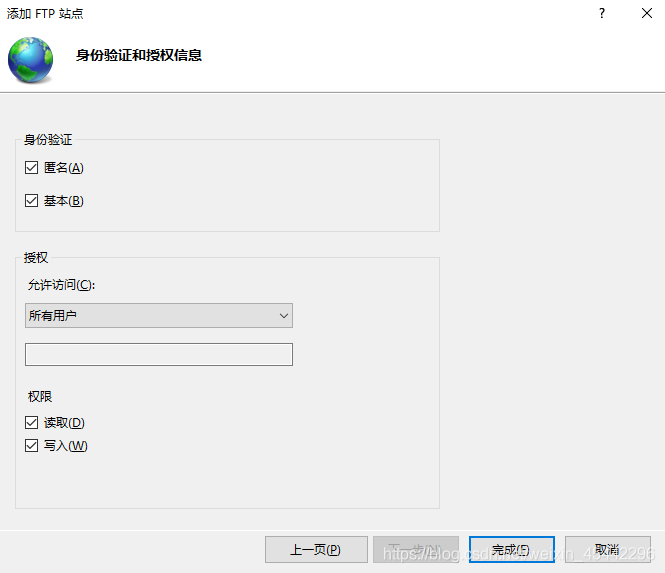
8、身份认证信息选择如下图所示
9、查看站点已启动

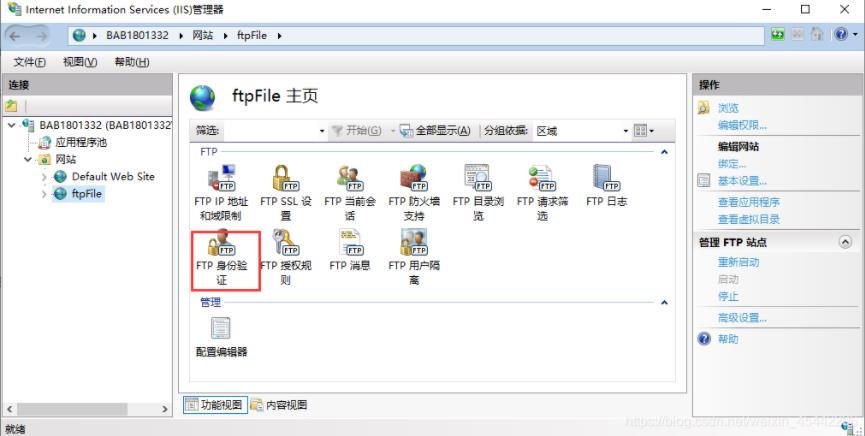
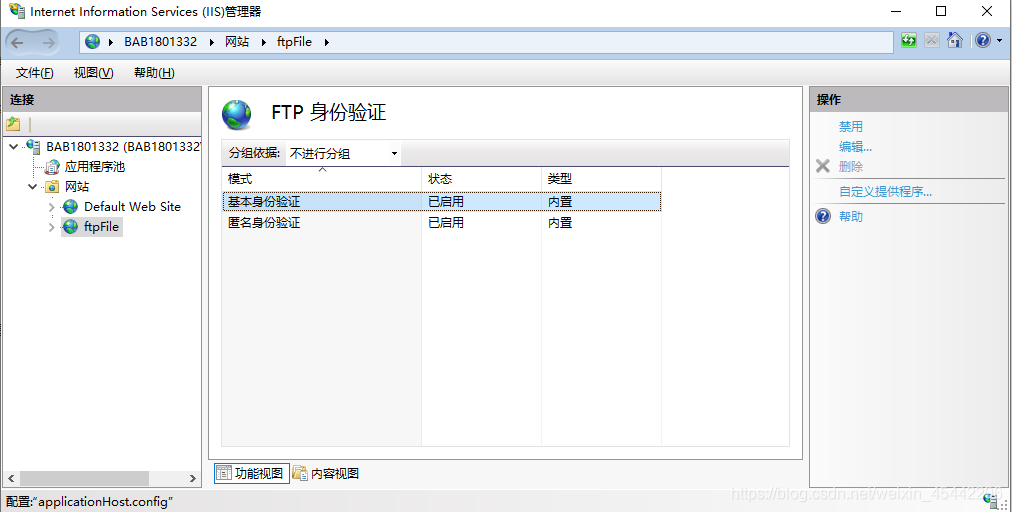
10、开启身份认证,点击“FTP身份验证”
11、启用身份验证
12、网页输入ftp://IP:21查看,验证FTP服务器,搭建完成。